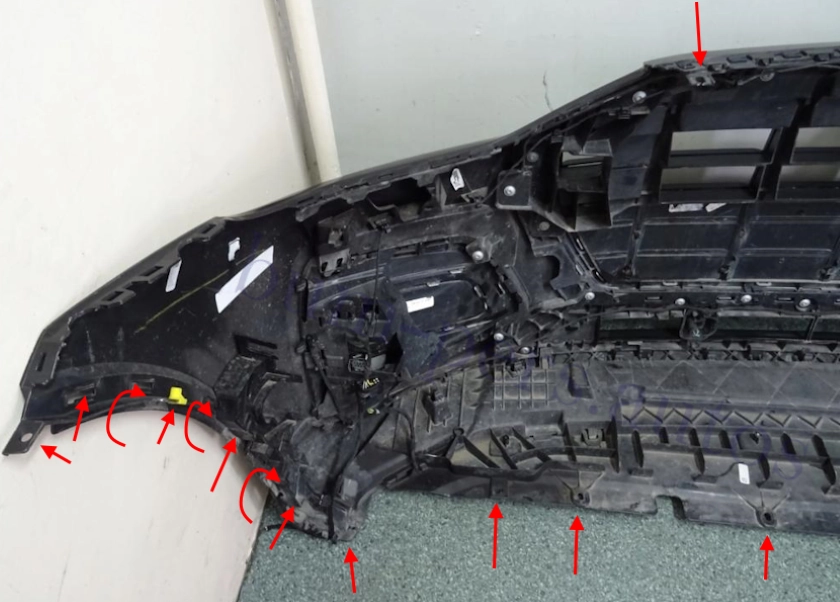
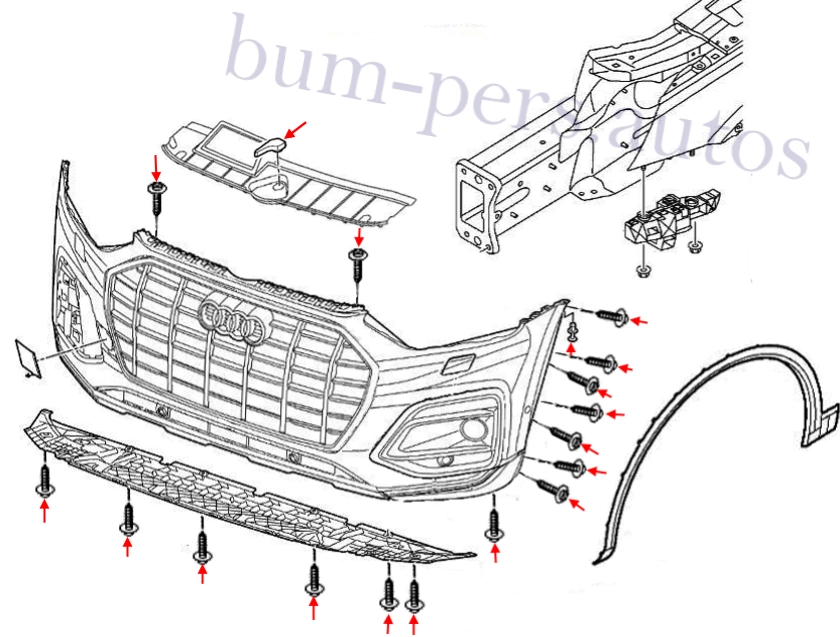
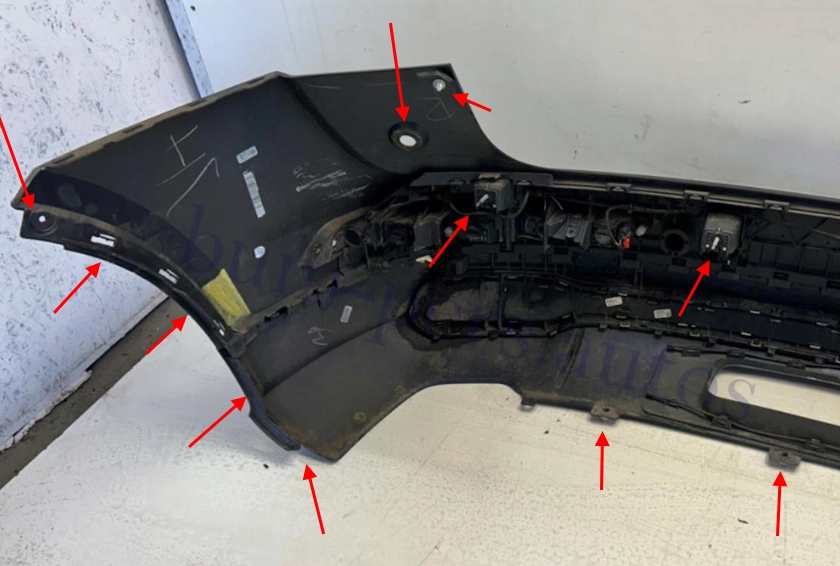
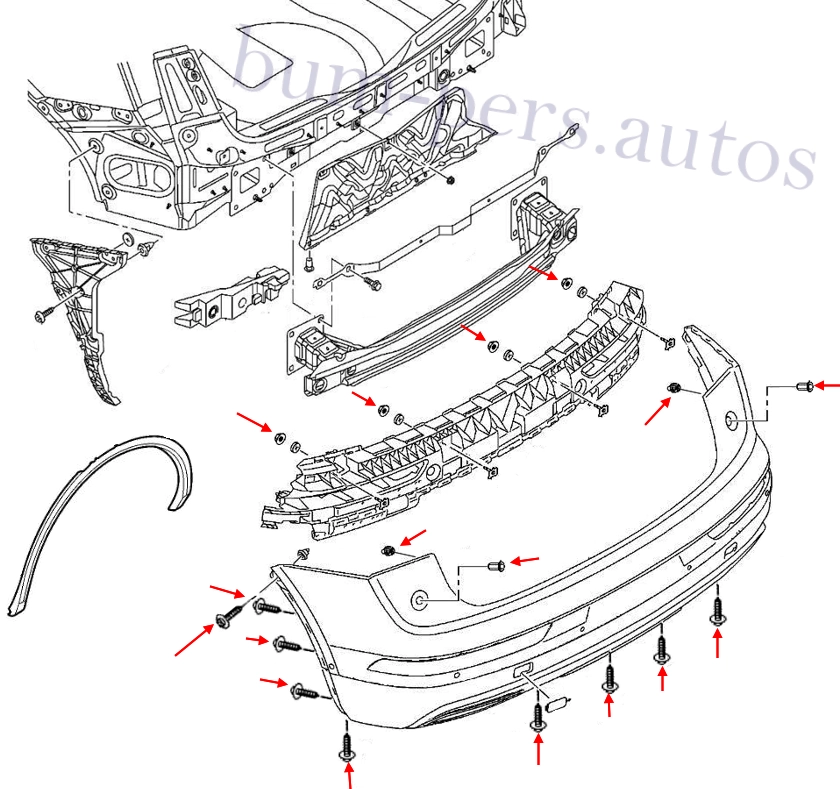
Mounting locations may vary slightly depending on the year of manufacture .
How to remove the front bumper
- open the hood.
- remove the hood release lever (you need to press the latch and pull the lever up).
- remove the plastic lining above the radiator grille (held on the latches, pull up).
- under the trim, unscrew the two screws (twisted from top to bottom) that secure the upper part of the front bumper.
- on the bottom side, we unscrew eight screws (twisted from the bottom up), which fasten the lower part (plastic cover).
- turn the wheels to the side.
- we release the wheel arch extensions (the front part, pull it up from the bottom).
- under the wheel arch extensions, we unscrew three screws on each side.
- in the wheel arches, we unscrew three screws on each side, which fasten the fenders (front part).
- we move the fenders to the side, unscrew the two screws and pull out the two pistons that secure the corners of the bumper.
- release the latches in the wings (pull the corners towards you).
- with an assistant, we pull the bumper in front (we look at the wires).
- disconnect the connectors of electrical equipment (there will be a lot of connectors, depending on the configuration.


How to remove the rear bumper
- open the trunk lid.
- we unscrew two screws in the trunk opening.
- remove the rear trunk panel trim (removed up), pull out two plugs in the rear panel and unscrew two nuts under them (you will need a long cap head of 10 mm, do not drop the nuts into the hidden cavity).
- in the side linings of the trunk, open the covers and screw in another nut on each side under them.
- on the bottom side, we unscrew the six screws (twisted from bottom to top) that secure the lower part of the rear bumper and the wheel arch extensions.
- we release the wheel arch extensions (the rear part, pull it up from the bottom) and unscrew one screw on each side under them, which fasten the corners to the wings.
- we take the slats to the side and unscrew the three screws on each side that secure the sides.
- release the latches in the wings (pull the corners towards you).
- release the hidden pistons in the trunk opening (pull on yourself).
- with an assistant, we gently pull the bumper back (we look at the wires).
- disconnect the connectors of the electrical equipment on the right side of the traffic hike behind the side lining of the trunk.


Audi Q5 is the second generation. Type FY 80A
Production 2016-present
Model years 2017-present
Body type:
5-door SUV
5-door coupe-SUV (Sportback)
Plastic bumpers:
A mixture of polypropylene and polyethylene, thermoplastic polyolefin elastomer, 15% mineral filler. Marking >PP/PE+TPO-TD15<
