How to remove the front bumper
- open the hood.
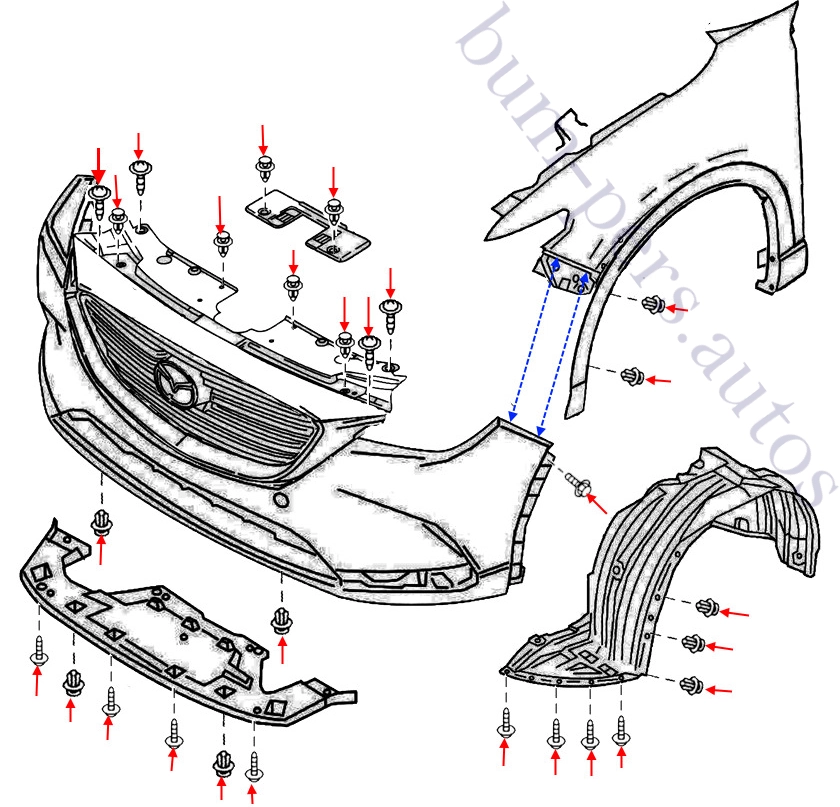
- we take out two clips and remove the hood lock cover.
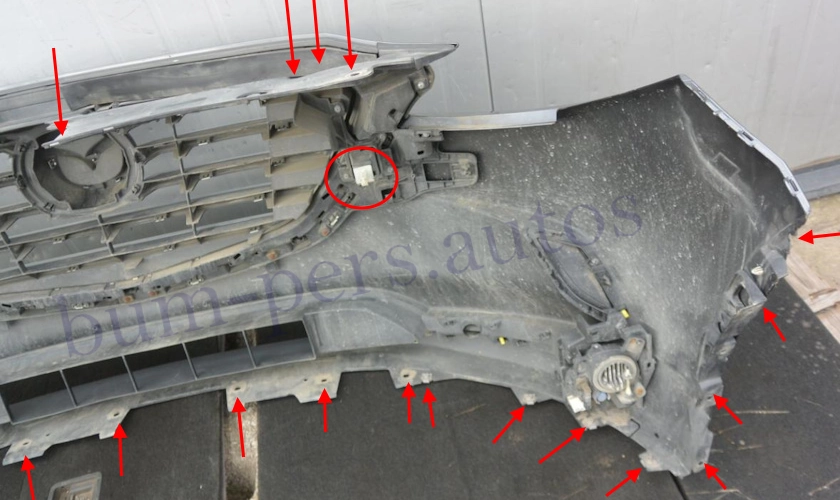
- unscrew the four screws and pull out the four clips that secure the upper part of the front bumper (radiator grille).
- on the bottom side, we unscrew the eight screws (twisted from bottom to top) that secure the left and right fender pads.
- also, on the bottom side, unscrew the four screws and remove the two clips (twisted and inserted from the bottom up) that secure the lower protective panel (the panel can not be removed).
- pull the lower protective panel down and remove the two clips.
- to make it more convenient, turn the wheels to the side.
- in the wheel arches, we pull out two clips on each side that attach the wheel arch extensions and three clips on each side that attach the fenders (front part).
- we release the front part of the wheel arch extensions from the bumper (it is held on six internal clips each, starting from the bottom we gently pull on ourselves).
- under the arch extensions, we unscrew one screw on each side, which fix the corners to the brackets in the wings.
- we release the latches in the wings (you need to pull the corners of the bumper towards you).
- we release two latches in the inner side of the radiator grille (you just need to pull on yourself).
- with the assistant, we remove the bumper forward (pay attention to the wires).
- we release the connectors of fog lights and other electrical components (if any).


How to remove the rear bumper
- open the trunk lid.
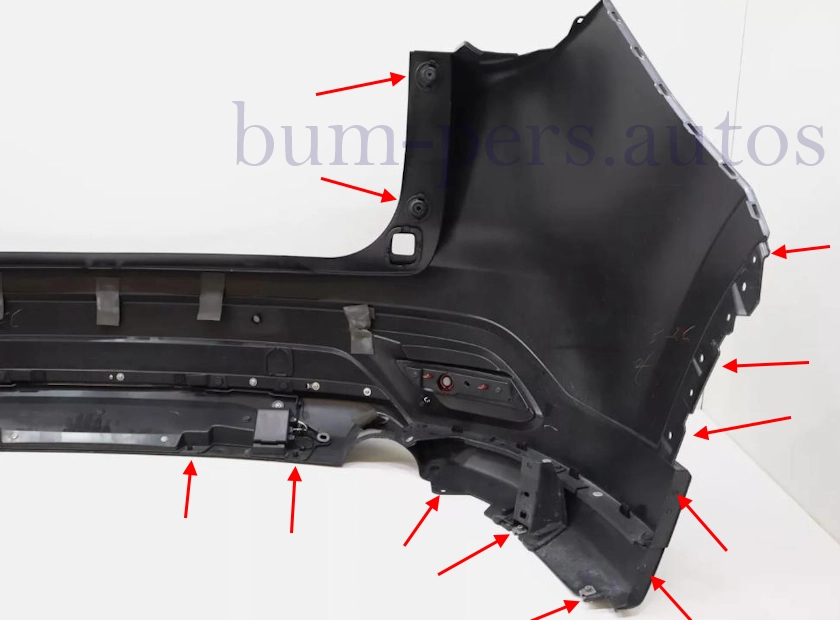
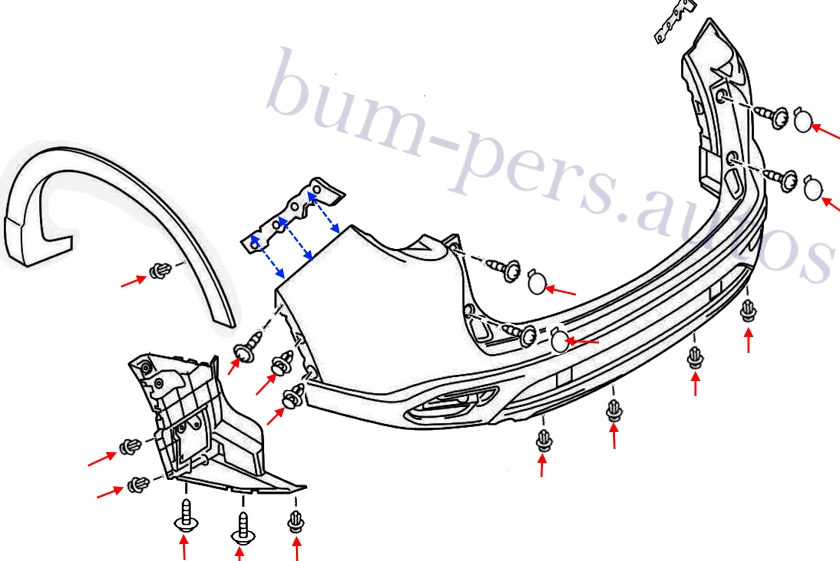
- under the trunk lid, remove the four plugs and unscrew the four screws under them.
- on the bottom side, remove the six clips and unscrew the four screws (twisted and inserted from the bottom up).
- in the wheel arches, we take out two clips on each side that attach the fenders and one clip on each side that attach the wheel arch extensions.
- we release the wheel arch extensions from the bumper (they are held on internal clips, we pull them up from the bottom).
- under the arch extensions, unscrew one screw and remove two clips on each side.
- release the latches in the wings (gently pull the corner towards you).
- with the assistant, we remove the bumper back (we look behind the wires).
- we release the connectors of the parking assistant and lighting devices (if installed).


Mazda CX-9 MK2. TC model code. Production: 2016-2023. Restyling 2020-2023.
Body type:
5-door SUV (Mid-size crossover SUV).
Assembling:
Japan: Hiroshima (Ujima no. 1 plant)
Russia: Vladivostok (Mazda Sollers)
Plastic bumpers:
Polypropylene with the addition of filler. Marking >PP-(T25+S20)<.
