Depending on the year of manufacture and body type, the mounting points differ slightly.
How to remove the front bumper
- open the hood.
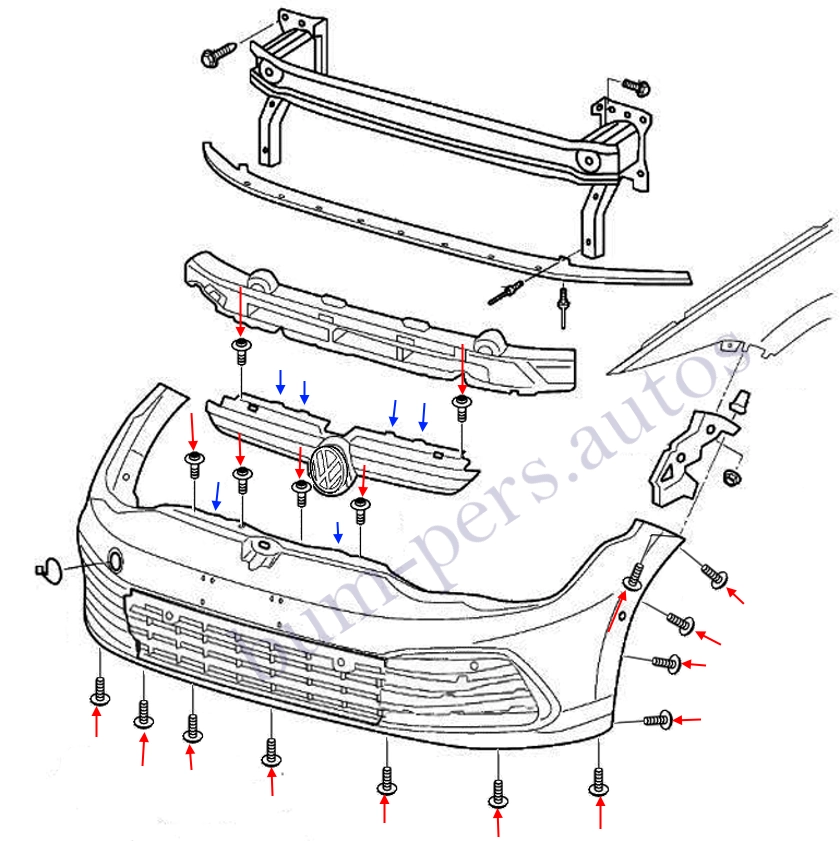
- under the hood, we unscrew two screws (Torx T25, twisted from top to bottom) that secure the radiator grille.
- now use a flat screwdriver to push the latches through the holes (marked with blue arrows on the diagram) and remove the radiator grille forward (please note that there may be electrical connectors on the back of the radiator grille).
- under the radiator grille, we unscrew the four screws (Torx T25, twisted from top to bottom) that secure the upper part of the front bumper.
- on the bottom side, we unscrew seven screws (Torx T25, twisted from bottom to top), which attach the engine compartment lining and fenders.
- turn the wheels to the left or right.
- in the wheel arches, we unscrew four screws (Torx T25) on each side, which fasten the fenders (the front part is completely unnecessary to remove, just bend it to the side).
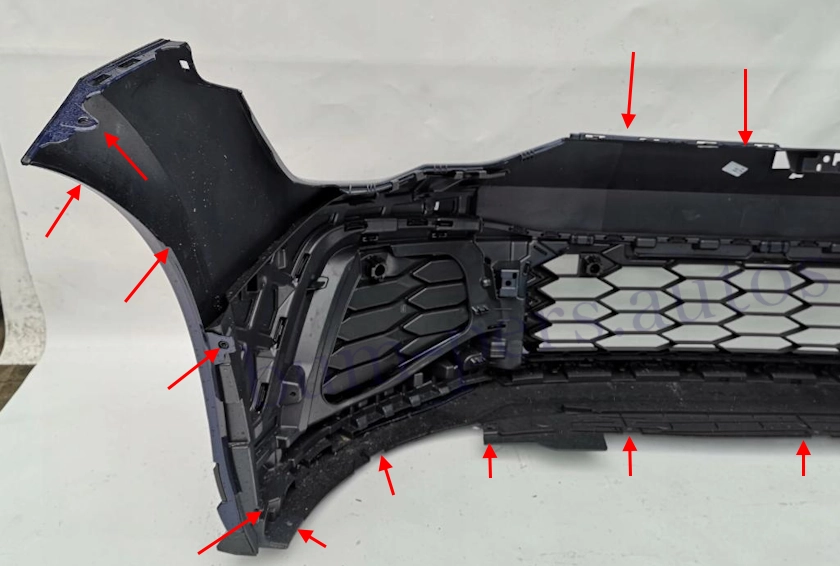
- we unscrew one screw on each side (Torx T25, twisted from bottom to top), which fix the corners to the wings.
- we release the latches in the wings (we take the corner with our hand and pull it towards us).
- use a flat screwdriver to release the latches in the upper part (between the headlights, marked with blue arrows on the diagram).
- with an assistant, we remove the front bumper forward (we look so as not to break the wires).
- disconnect the connectors of electrical equipment.
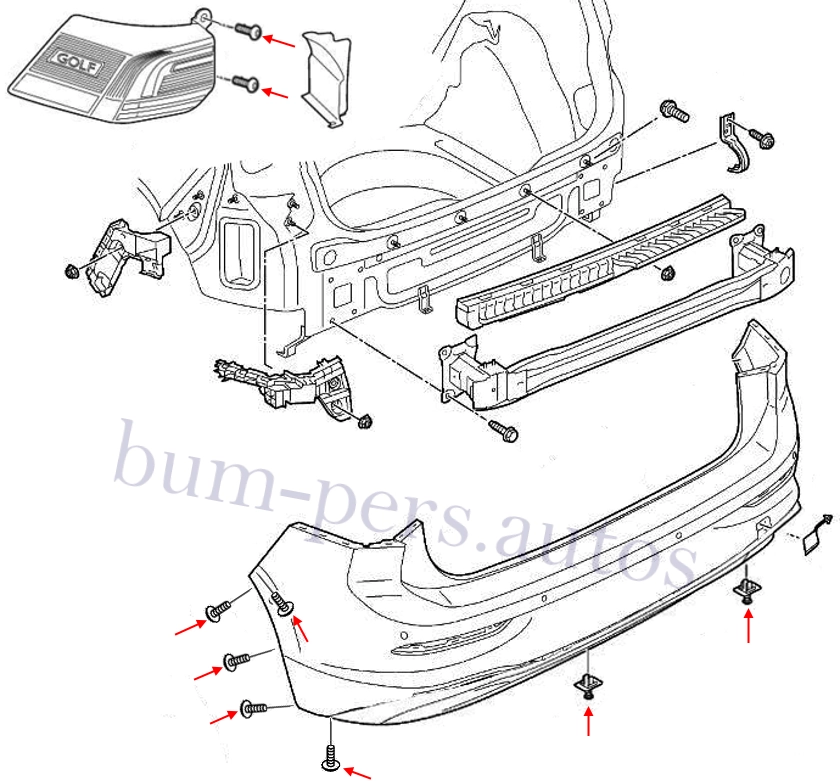
How to remove the rear bumper
- open the trunk lid.
- remove the pads near the taillights.
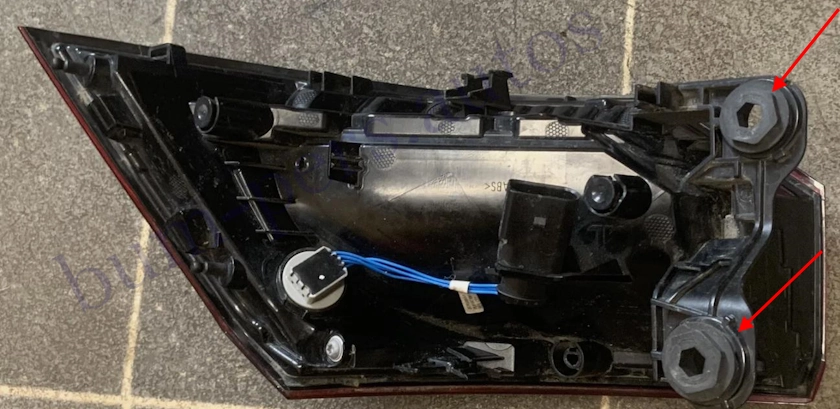
- under the pads, we unscrew two screws on each side, release them from the retainers in the wings and remove the taillights.
- on the bottom side, unscrew two (Golf Variant four) screws and pull out two spacer pistons (you need to unscrew the screw and remove the spacer piston), which attach the lower part of the rear bumper.
- in the wheel arches, we unscrew three screws (Torx) on each side, which fasten the fenders (rear part).
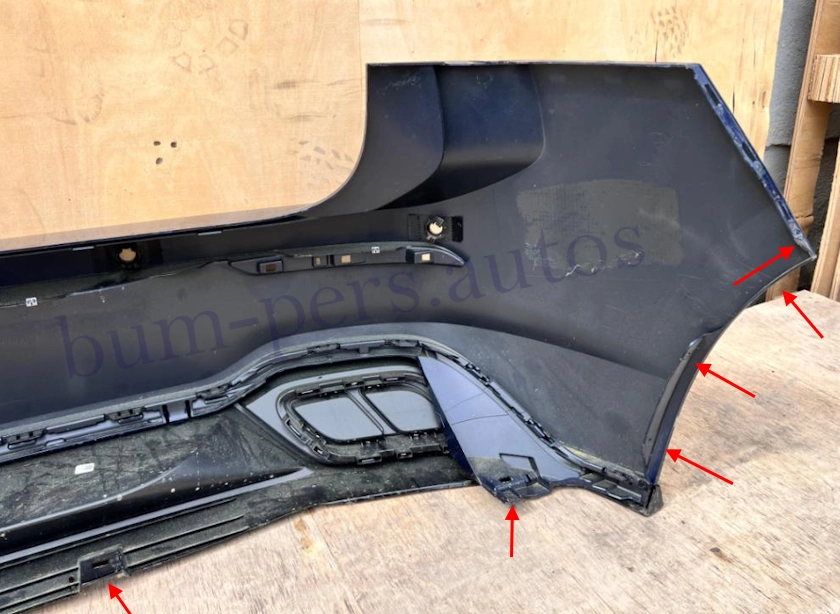
- we unscrew one screw on each side (Torx, twisted from top to bottom), which fix the corners to the wings.
- release the latches in the wings (pull the corners towards you).
- release the latches under the taillights.
- with an assistant, we remove the rear bumper back (we look so as not to break the wires).
- we release the connectors of electrical equipment (license plate lighting, parking sensors).
Volkswagen Golf Mk8, Type CD1/CG5
Production: 2019-present
Model Years: 2019-Present
Body type:
5-door hatchback
5-door station wagon (Golf Variant)
Assembling :
Germany: Wolfsburg (Volkswagen plant in Wolfsburg )
China: Foshan ( FAW-VW, from 2020)
Malaysia: Pecan ( HICOM )
Plastic bumpers (may differ):
A mixture of polypropylene and ethylene / propylene, 10% mineral filler. Marking >PP+E/P-TD10<
Or:
Polypropylene plus triple copolymer of ethylene, propylene and diene, 10% mineral filler. Marking >PP+EPDM-TD10 <
