How to remove the front bumper
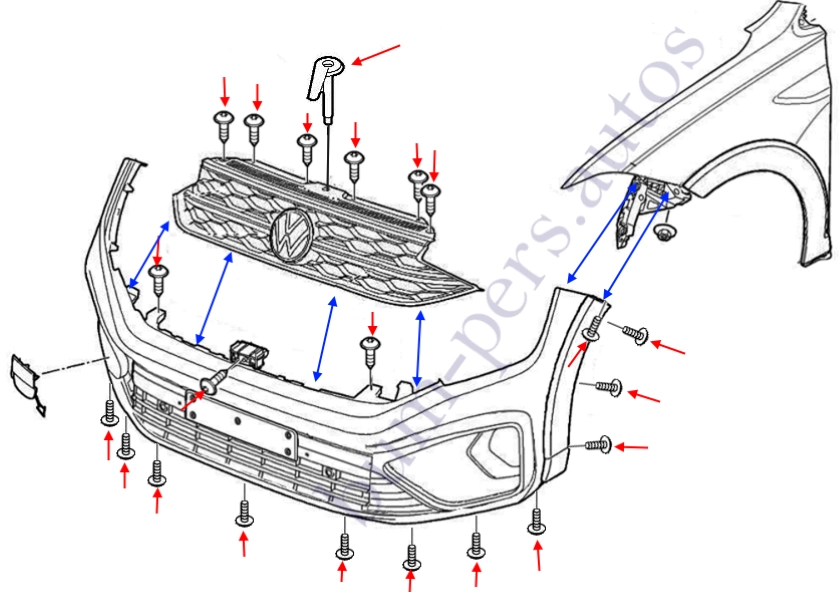
- lift up and fix the hood.
- remove the hood release lever (you need to press the latch and pull the lever up).
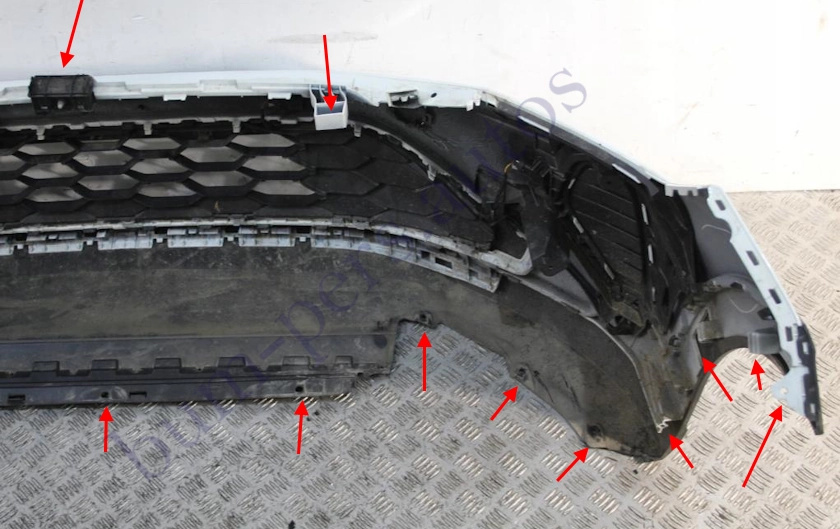
- we unscrew the six screws (twisted from top to bottom) that secure the radiator grille.
- release the lower part from the latches (pull it parallel to the ground) and remove the radiator grille.
- in the opening under the grille, unscrew the three screws that secure the upper part of the front bumper.
- we turn the wheels in turn to the inside.
- (on each side) unscrew the three screws in the wheel arch and the three screws on the bottom side that secure the front part of the fender.
- (on each side) push the edge of the fender to the side and unscrew the screw (twisted from the bottom up), which attaches the corner to the guide profile in the wing.
- we unscrew the three screws (twisted from the bottom up) that secure the lining from the bottom side.
- (on both sides) release the latches from the guide profiles in the wings (take the corner and gently pull it towards you. If the latches do not come out, then you can loosen the nuts and lower the profiles down).
- with an assistant, we remove the front bumper forward (make sure not to break the wires).
- disconnect the connectors from the lighting fixtures and the parking assistant (if any).


How to remove the rear bumper
- open the trunk lid.
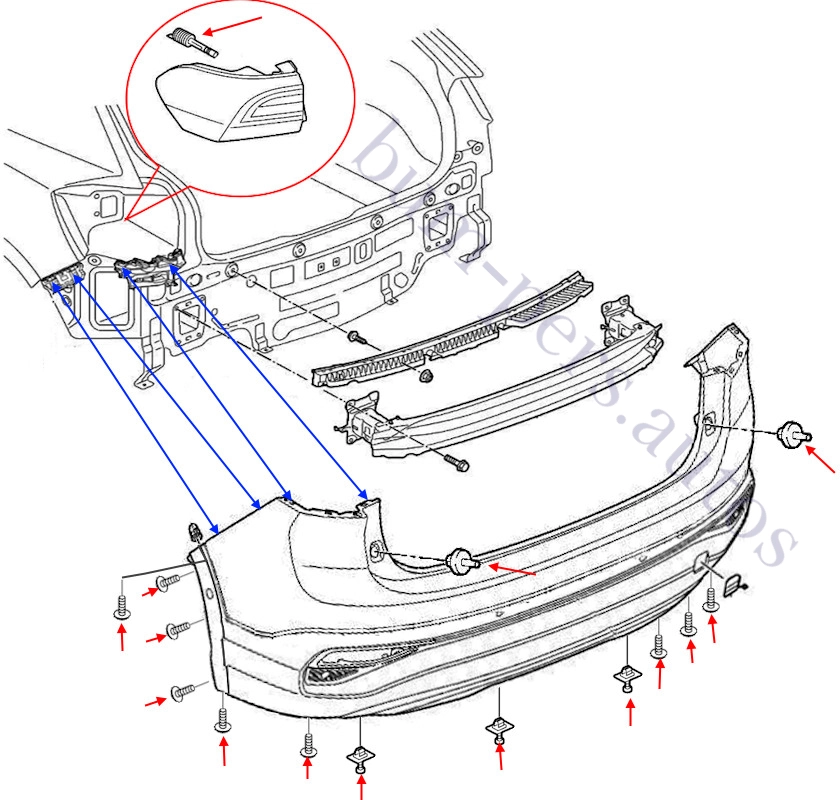
- in the trunk opening, we pull out two plugs.
- we open niches in the side linings of the trunk.
- in the niches, we unscrew the screws (made of plastic), release them from the retainers in the wings and remove the taillights.
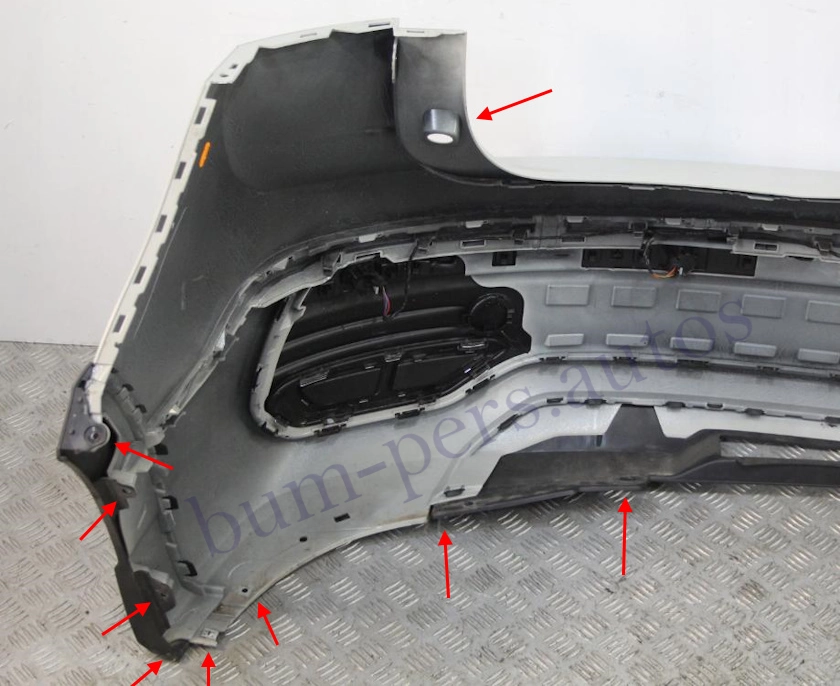
- in the wheel arches, we unscrew three screws on each side, which fasten the fenders (rear part).
- behind the fenders, we unscrew one screw on each side (twisted from bottom to top), which fasten the corners (arch linings) to the wings.
- we pull out the spacer pistons and unscrew the screws from the bottom side (the number may vary depending on the configuration).
- with a jerk, we pull on ourselves and release the latches in the wings.
- lift the retainers and release the latches under the taillights.
- carefully remove the bumper back (you need two people, pay attention to the wires).
- disconnect the connectors of electrical components.


Volkswagen Taigo, Model code CS1
Also called Volkswagen Nivus (Latin America)
Production: 2020-present
Assembling:
Spain: Pamplona
Brazil: São Bernardo do Campo (Volkswagen do Brasil)
Body type: 5-door liftback (Compact Crossover SUV)
Plastic bumpers (may differ):
A mixture of polypropylene and ethylene / propylene, 10% mineral filler. Marking >PP+E/P-TD10<
