Depending on the year of manufacture, the mounting points differ.
How to remove the front bumper
Attention, restyling (from 2023) the upper part of the bumper is fixed with latches instead of screws, so it is unnecessary to remove the radiator grille.
- open the hood.
- remove the seal over the headlights and radiator grille.
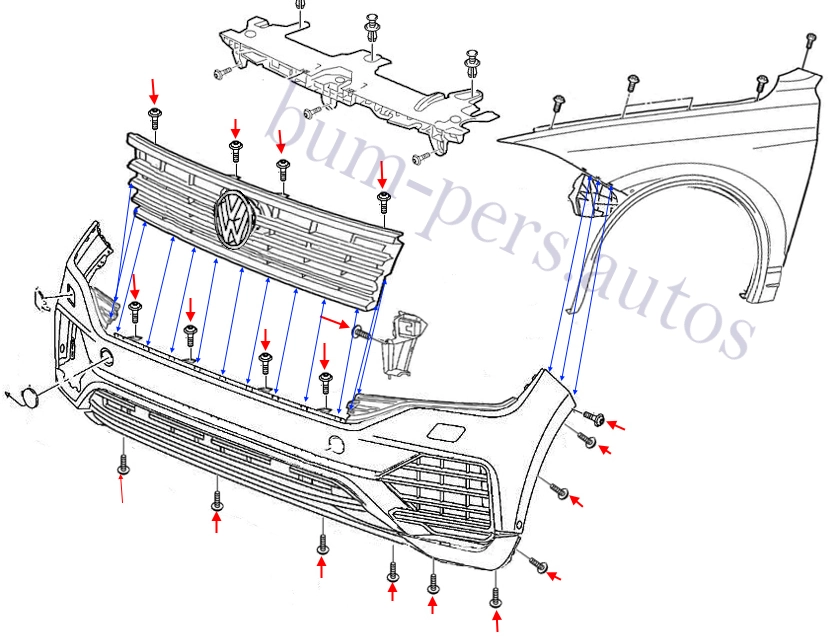
- unscrew the four screws (twisted from top to bottom) that secure the radiator grille.
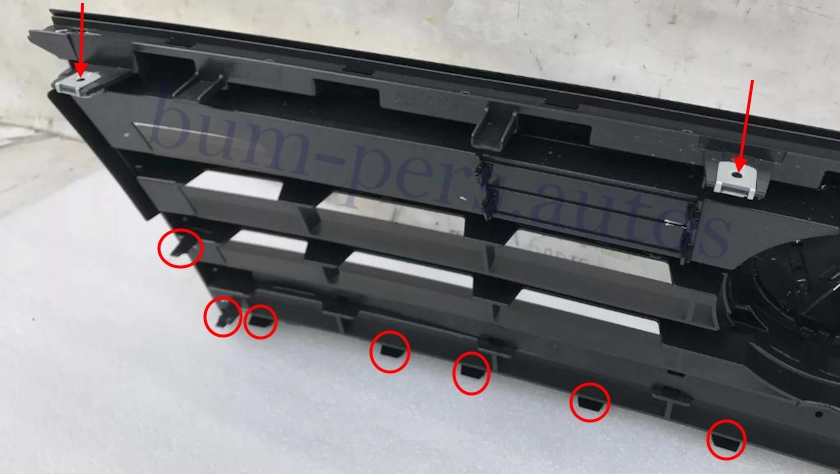
- release the latches and remove the radiator grille (the grille is fixed with nine latches in the lower part and four in the sides. It is very difficult to shoot. You can get to the side latches with a thin long screwdriver, to the lower ones with a thin plastic object, such as a credit card. You can not pull smoothly, you need to pull with a jerk of moderate force).
- behind the grille, we unscrew the six screws that secure the upper part of the front bumper.
- on the bottom side, we unscrew the nine screws that secure the lower part and the wheel arch extensions.
- we turn the wheels into the inner part of the arch.
- we release the expanders of the wheel arches of their bumpers (they are held on the latches, we pull them up from the bottom. In order not to break the latches, especially in the wing, bend the fender cover and squeeze them with your fingers).
- unscrew the screws that secure the fenders (front part).
- unscrew the screws that secure the corners to the guide profiles in the wings.
- release the latches in the wings (pull the corners towards you).
- (restyling from 2023) we release the latches behind the radiator grille with a jerk.
- with an assistant, we remove the front bumper forward (we look so as not to break the wires and hoses).
- disconnect the connectors of electronic components.
- disconnect the headlight washer hoses (please note that liquid will flow out of the tank).


How to remove the rear bumper
- open the trunk lid.
- we remove the rear one and release the edges of the side linings of the trunk (you need to get access to the back of the taillights).
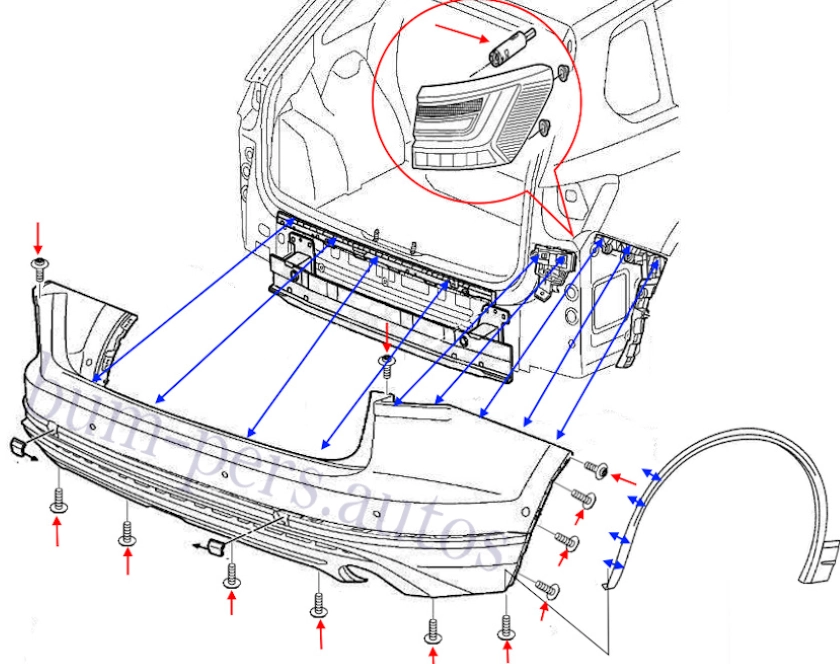
- we unscrew the plastic fixing elements that attach the taillights.
- we release the latches in the fenders (pull them towards us) and remove the taillights.
- under the taillights, we unscrew the two screws that secure the upper part of the rear bumper.
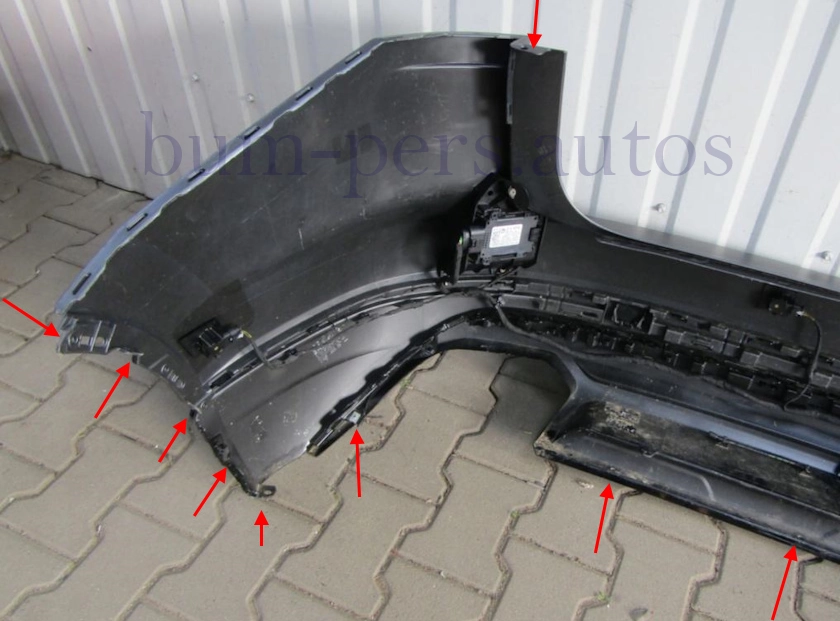
- on the bottom side, we unscrew eight screws (twisted from the bottom up), which fasten the lower part and the wheel arch extensions.
- (if any) in the wheel arches, unscrew the screws and remove the mudguards.
- release the rear part of the wheel arch extensions from the latches (gently pull them towards you, starting from the bottom).
- behind the wheel arch extensions, we unscrew the screws that attach the corners of the bumper to the fenders.
- we unscrew three screws on each side, which fasten the fenders (rear part).
- release the latches in the wings (pull the corners towards you with a jerk).
- release the latches under the taillights.
- release the latches in the trunk opening.
- with the assistant, we remove the bumper back (we look so as not to damage the wires).
- on the left side, disconnect the connectors of electrical equipment.


Volkswagen Touareg Mk3, model code CR
Production: 2018-present, facelift 2023-present
Assembling:
Slovakia: Bratislava (Volkswagen Bratislava Plant)
Malaysia: Pekan (HICOM)
Body type:
5-door SUV
Plastic bumpers (may differ):
Polypropylene plus triple copolymer of ethylene, propylene and diene, 30% mineral filler. Marking >PP+EPDM-MD30<
