How to remove the front bumper
- open the hood.
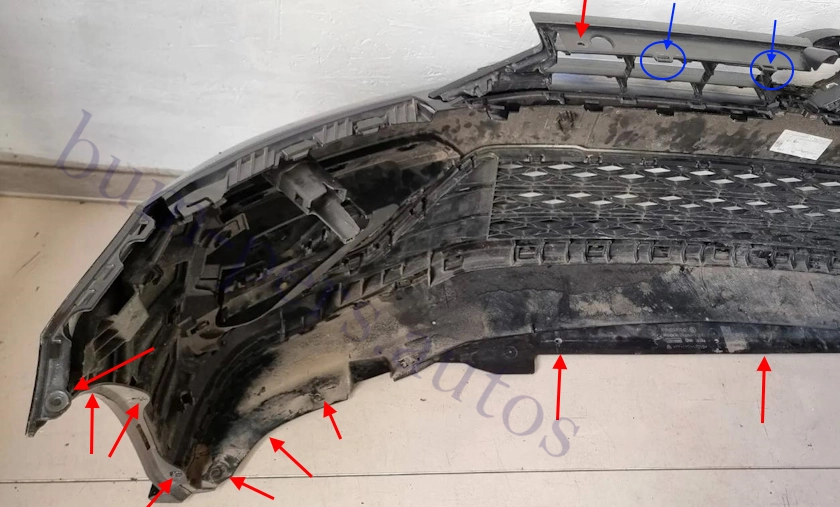
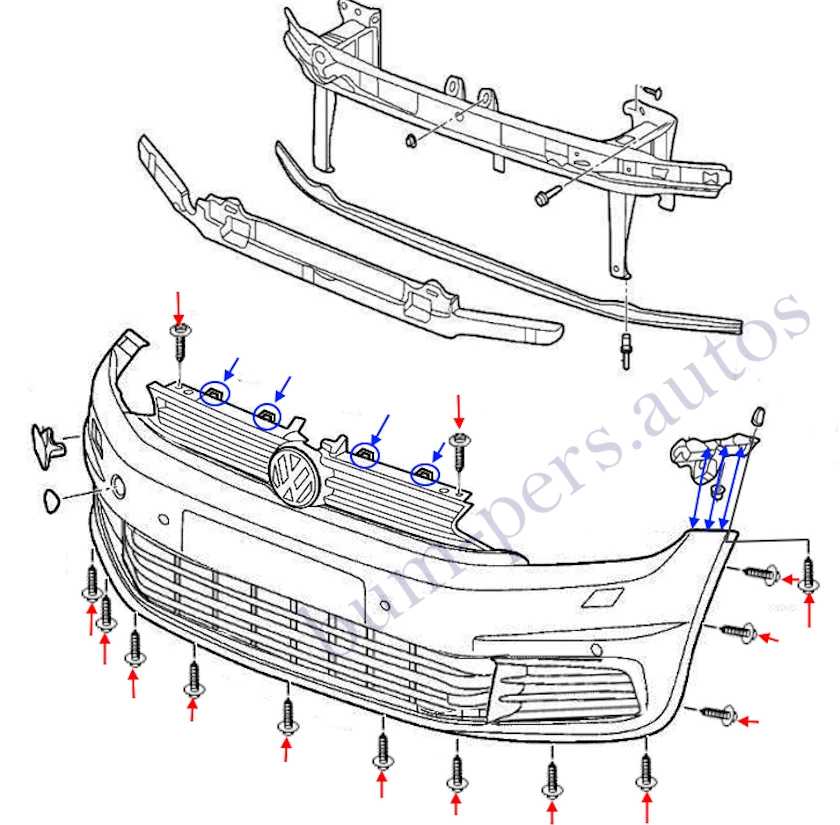
- under the hood, unscrew the two screws (twisted from top to bottom) that secure the radiator grille.
- there are four holes in the front support panel, behind the radiator grille. Through these holes, use a flat screwdriver to push down on the latches (indicated by the blue arrows), while simultaneously pulling the top of the radiator grille towards you.
- on the bottom side, we unscrew nine (eleven) screws (twisted from the bottom up) that secure the lower part of the front bumper.
- turn the wheels to the inside of the arch.
- (on both sides) in the wheel arch, unscrew the three screws that secure the front part of the fender.
- (on both sides) unscrew the screw (twisted from bottom to top), which is attached to the angle of the guide profile in the wing.
- release the latches in the wings (indicated by removing the arrows, pull the corners towards you).
- with an assistant, we remove the front bumper forward (we look for wires and hoses).
- disconnect the fog lamp connectors (if any).
- disconnect the common headlight washer hose from the pump (liquid will flow out, you need to prepare a container or bend the hose).


How to remove the rear bumper
- open the trunk lid.
- in the side linings of the trunk, open the decorative hatches (you need to pry with a flat screwdriver.
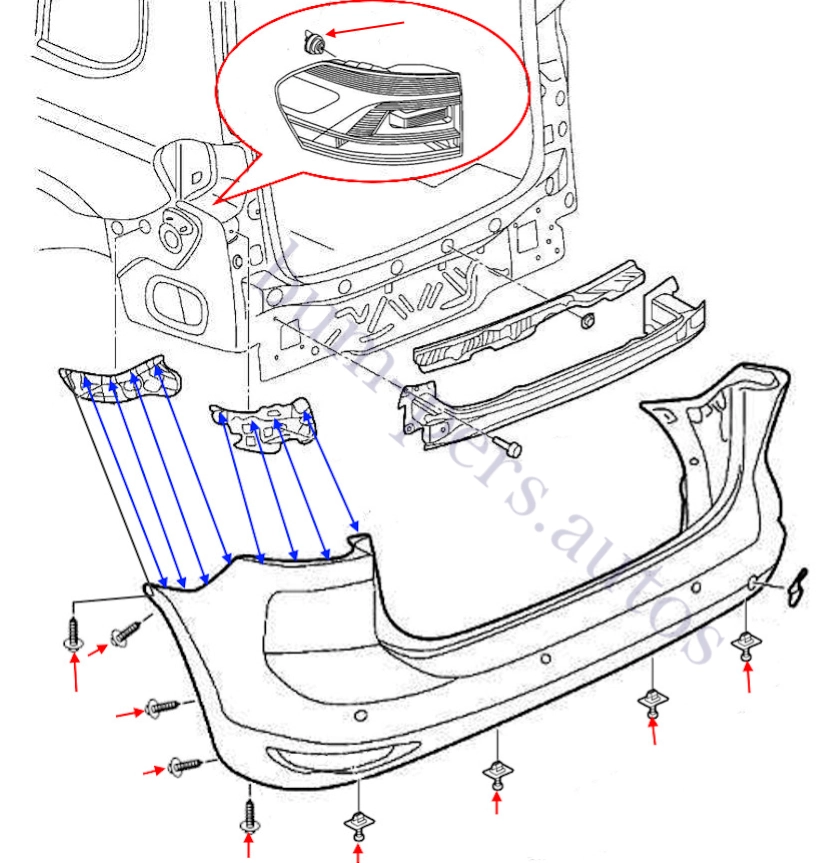
- under the hatches, we release the electrical connectors and unscrew the plastic decorative elements (nuts with ears).
- take out the taillights.
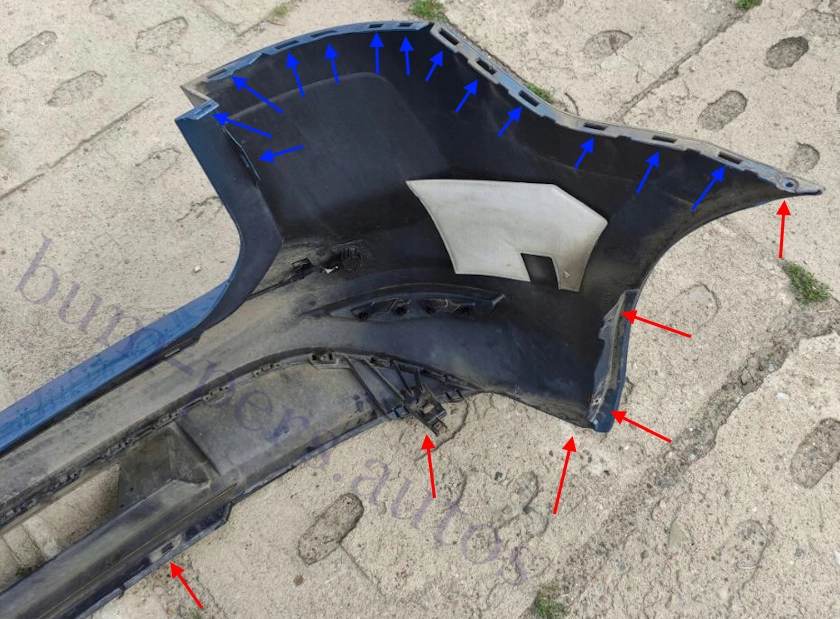
- on the bottom side, we unscrew two screws and pull out four spacer pistons (first the central pin is unscrewed, then the spacer piston is removed).
- (on both sides) unscrew the screws that secure the rear part of the fender.
- (on both sides) unscrew the screw that secures the angle to the guide profile in the wing.
- release the sides from the latches in the guide profiles (indicated by blue arrows, pull the corners towards you).
- we release the latches under the taillights (indicated by the arrows, you need to lift the latches with a flat screwdriver and pull the upper part towards you).
- with the assistant, we remove the bumper back (we look so as not to damage the wires).
- disconnect the electrical equipment connectors (if any).


Volkswagen Touran Mk2, type 5T
Production 2015-present.
Assembling:
Germany: Wolfsburg
China: Changsha
Body type:
5-door minivan (Compact minivan)
Plastic bumpers (may differ):
Polypropylene plus triple copolymer of ethylene, propylene and diene, 10% mineral filler. Marking >PP+EPDM-TD10<
