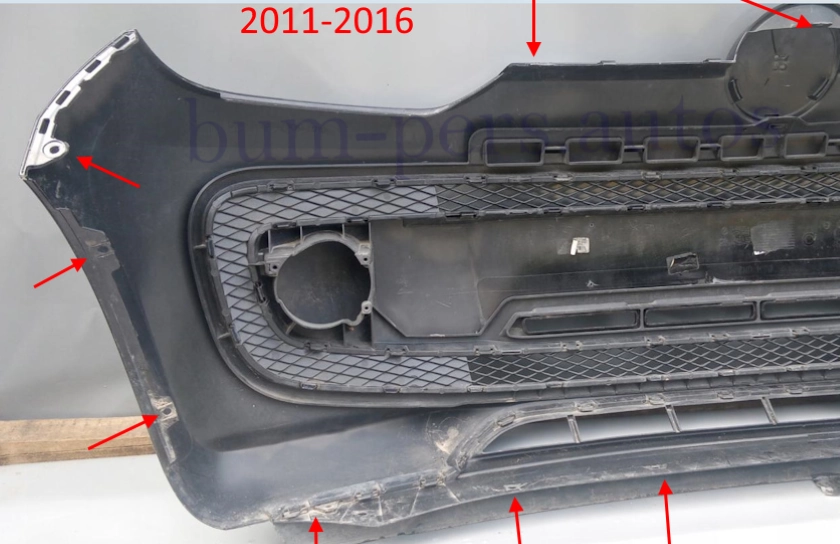
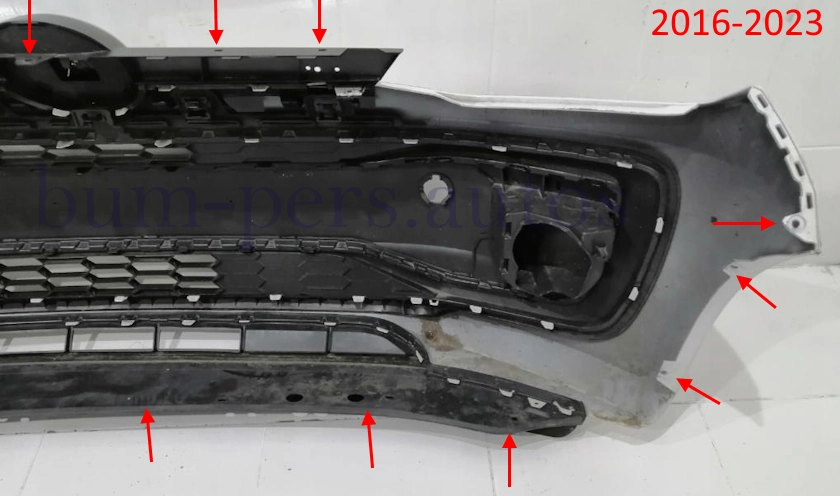
Depending on the year of manufacture, the mounting points differ slightly.
How to remove the front bumper
- open the hood.
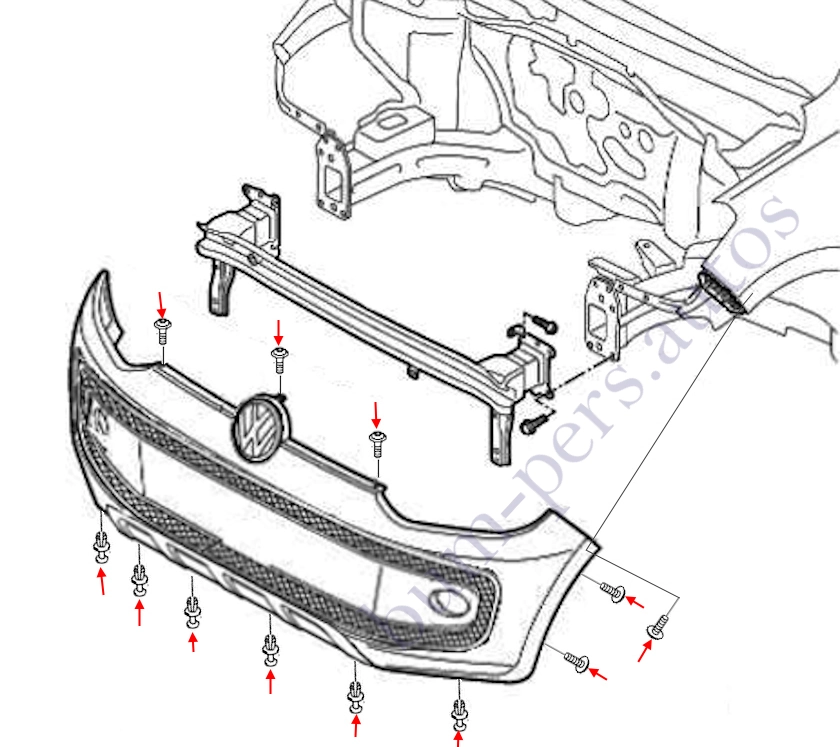
- under the hood, we unscrew three screws (2016-2023 five screws) that secure the upper part of the front bumper (radiator grille).
- from the bottom side, we pull out six pistons that attach the lower part.
- turn the wheels to the side.
- in the wheel arches, we unscrew two screws on each side, which fasten the fenders (in front).
- we move the fenders to the side and unscrew one screw on each side (twisted from bottom to top), which fix the corners to the wings.
- release the latches in the wings (pull the corners towards you).
- release the latches in the upper part (between the headlights).
- we remove the front bumper forward (we look so as not to break the wires).
- disconnect the connectors of electrical equipment.
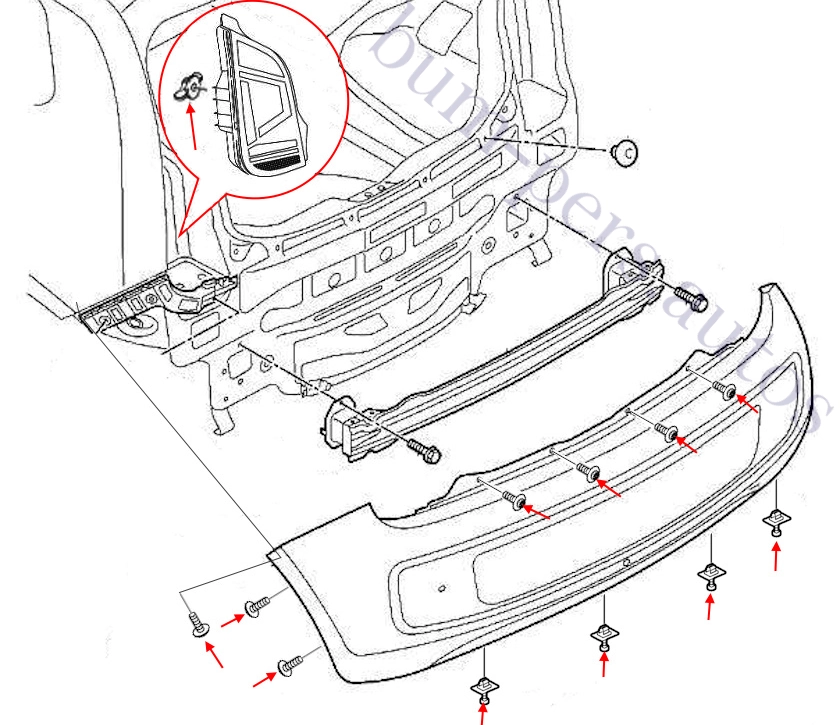
How to remove the rear bumper
- open the trunk lid.
- in the side linings of the trunk, open the hatches.
- on the hatches we unscrew the plastic nuts and remove the taillights.
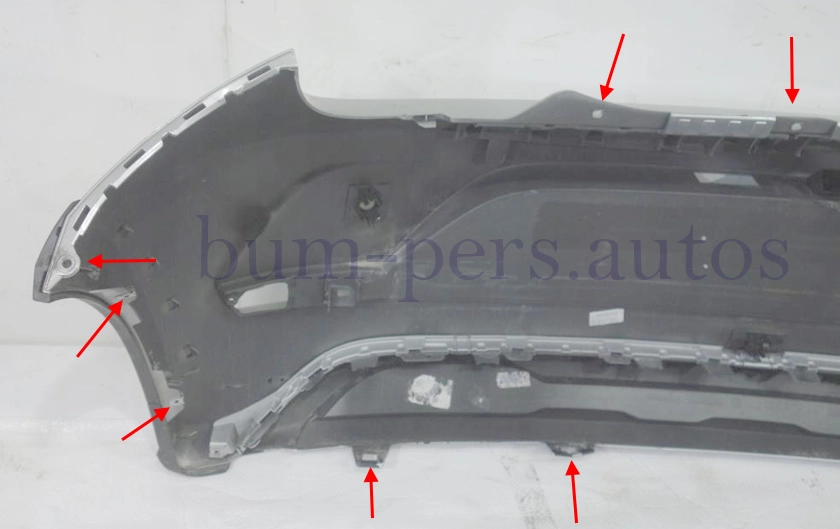
- in the trunk opening, unscrew the four screws that secure the top of the rear bumper.
- from the bottom side, we pull out four spacer pistons that attach the lower part (inserted from the bottom up).
- in the wheel arches, we unscrew two screws on each side, which fasten the fenders (rear).
- we move the fenders to the side and unscrew one screw on each side (twisted from bottom to top), which fix the corners to the wings.
- release the latches in the wings (pull the corners towards you).
- with the assistant, we remove the bumper back (we look so as not to break the wires).
- disconnect the connectors of the parking sensors (if any) and license plate lighting.
Volkswagen up!
Production 2011-2023, restyling 2016-2023.
Assembling:
Slovakia: Bratislava (Volkswagen Bratislava Plant)
Brazil: Taubate (Volkswagen do Brasil)
Body type:
3-door hatchback
5-door hatchback
Plastic bumpers (may differ):
Polypropylene plus triple copolymer of ethylene, propylene and diene, 10% mineral filler. Marking >PP+EPDM-TD10<
