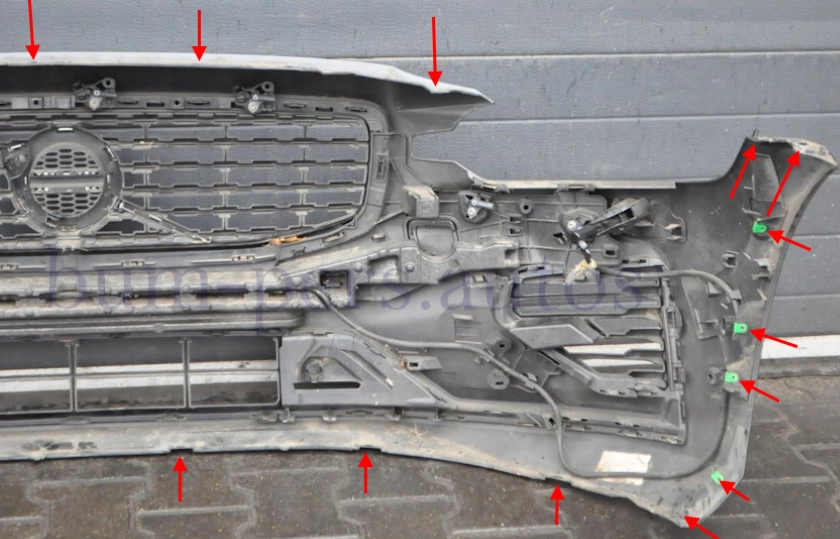
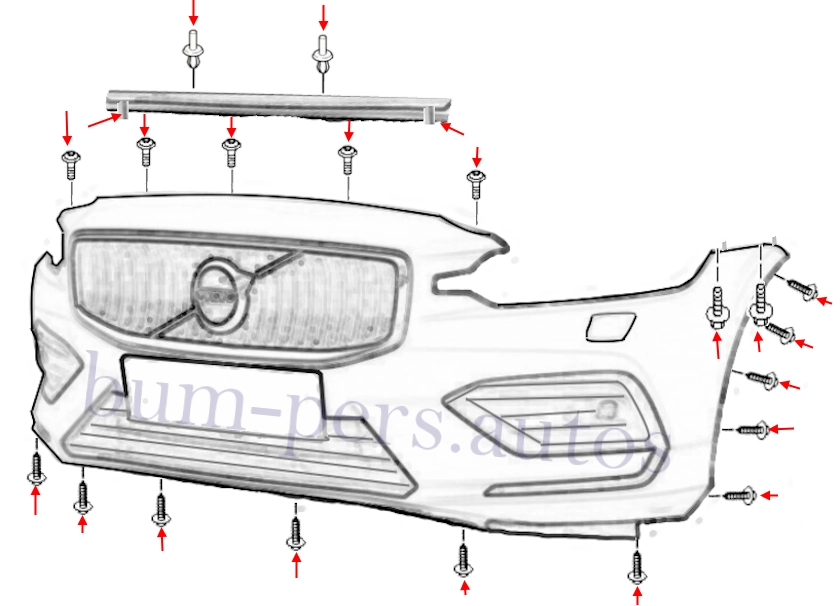
Depending on the year of manufacture and body type, the mounting points are slightly different.
How to remove the front bumper
- lift up and fix the hood.
- under the hood, pull out two pistons, release two latches and remove the plastic cover.
- under the cover plate, unscrew the five screws (TORX 20) that secure the upper part of the front bumper.
- on the bottom side, we unscrew six screws (TORX 20), twisted from the bottom up), which fasten the lower part and the plastic cover.
- turn the wheels to the side.
- in the wheel arches, we unscrew five screws on each side (TORX 20), which fasten the fenders (front part).
- (on the left and right sides) we take the fender to the side and unscrew two bolts (7 mm, twisted from the bottom up, you will need a cap head with an extension cord).
- we release the sides from the retainers in the wings (we take the corner and pull it down and towards ourselves).
- we release the latches under the headlights (being in front of the headlight, we pull on the sides with a jerk).
- we release the latches under the hood (you just need to lift the upper part).
- with the assistant, we remove the bumper forward (pay attention to the wires and hoses).
- on the left side, disconnect the electrical connectors (when dismantling, please note that the leads are short).
- if the headlight cleaning system is installed, disconnect the hoses.
How to remove the rear bumper
- lift up the trunk lid.
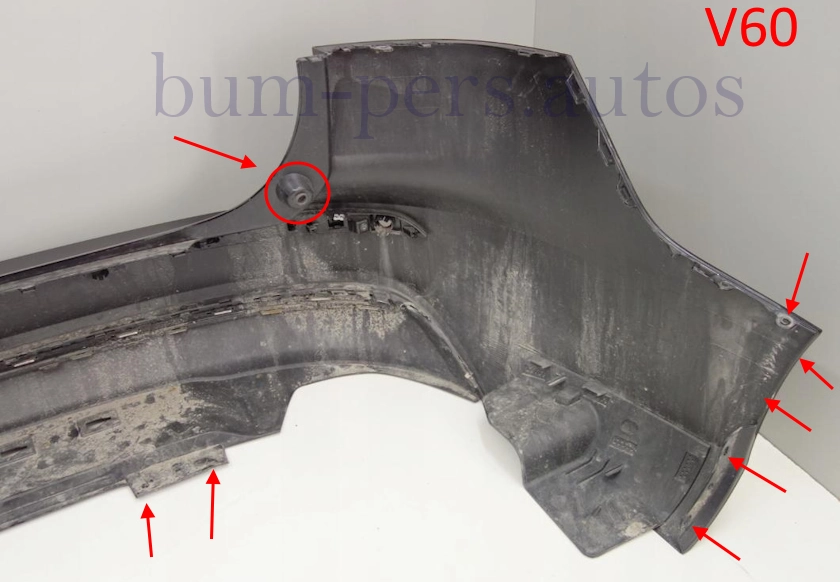
- (V60) in the trunk opening, unscrew the screws and pull out the shock absorbers.
- on the bottom side, unscrew the four screws (TORX 20, twisted from the bottom up).
- in the wheel arches, we unscrew four screws on each side, which fasten the fenders (rear part).
- (on each side) push the fender cover to the side and unscrew one screw (TORX 20, twisted from top to bottom), which secures the corner to the wing.
- release the latches in the wings (pull the corner down and on yourself).
- release the latches under the taillights (the latches come out hard, you may need to remove the taillights).
- with the assistant, we remove the bumper back (we look behind the wires).
- disconnect the connectors of electronic components (usually a common connector on the right side).
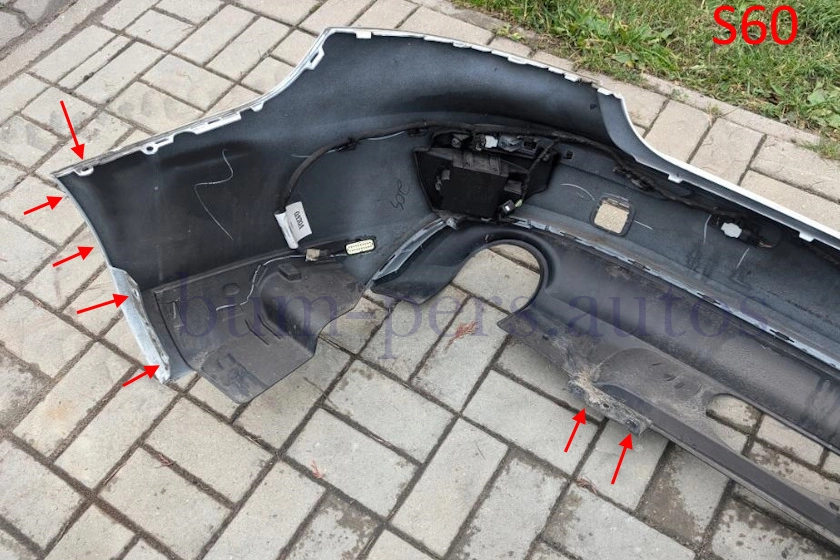
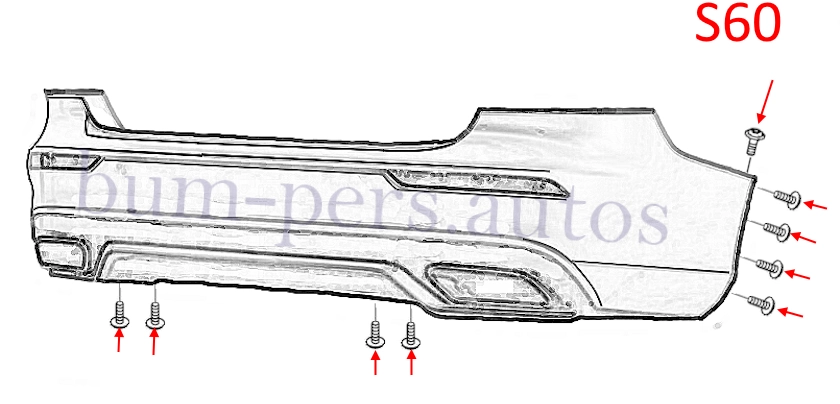
Volvo S60 MK3, production 2018-present
Volvo V60 MK2, production 2018-present
Assembling:
Sweden: Torslanda (Torslandaverken)
United States: Ridgeville, South Carolina (SCF)
Malaysia: Shah Alam (VCMM; 2020)
China: Chengdu (ZAMC / Polestar Plant)
Belgium: Ghent (Volvo Car Gent)
Body type:
4-door sedan (S60)
5-door station wagon (V60)
Plastic bumpers (may differ): A mixture of polypropylene and ethylene / propylene, 20% filler. Marking >PP+E/P-M20<
