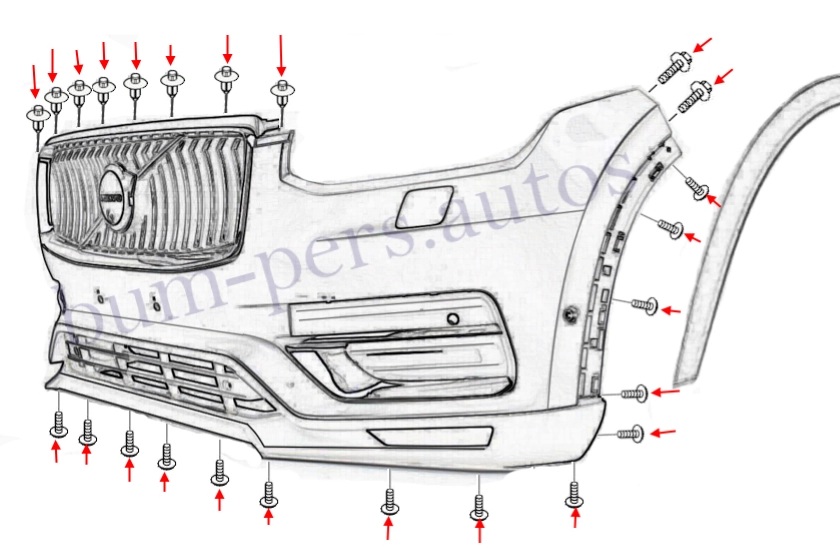
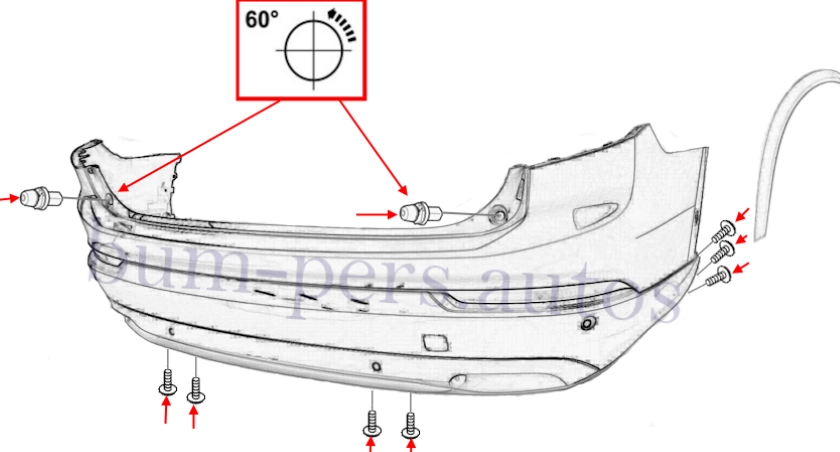
TORX T25 screws, 8 mm bolts, to remove the piston, you need to push in the center pin.
How to remove the front bumper
- open the hood.
- remove the rubber seal up
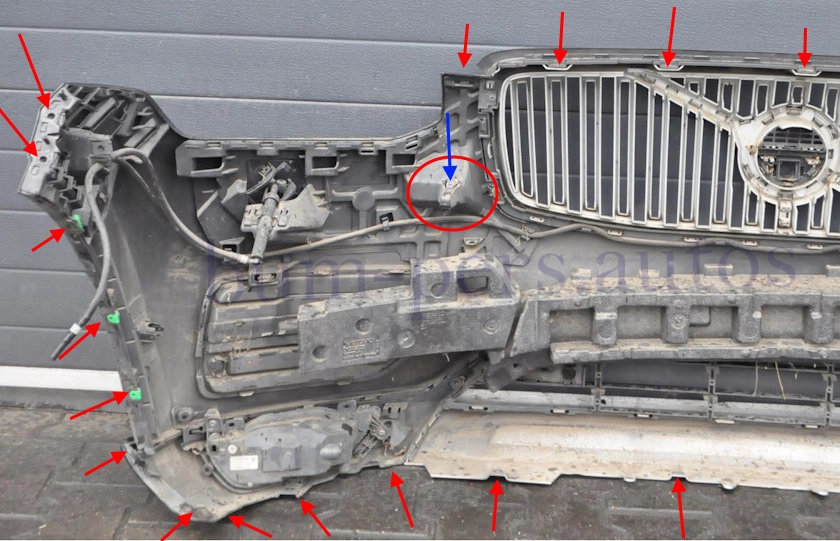
- we remove nine pistons (inserted from top to bottom), and remove three plastic facings (first the side ones, then the middle one).
- we remove the five pistons (inserted from top to bottom) that attach the upper part of the front bumper.
- on the side of the lower part, unscrew ten screws (twisted from bottom to top).
- take turns turning the wheels into the inner part of the arch.
- in the wheel arches, we unscrew five screws on each side, which fasten the fenders (front part).
- we release the front part of the wheel arch extensions from the bumper latches (we pull them up from the bottom, you can squeeze the latches with your fingers behind the fender).
- we move the fenders to the side and unscrew two bolts on each side (twisted from top to bottom, bolts are difficult to reach), which attach the sides to the wings.
- release the sides from the retainers in the wings (you need to pull the corner first down, then on yourself).
- we release two retainers under the headlights (the retainers are indicated in the picture by blue arrows. You need to use a long flat screwdriver to push the latch, while pulling the bumper forward)
- with an assistant, we remove the bumper forward (we look for wires and hoses).
- disconnect the connectors of electronic components.
- disconnect the common headlight washer hose.


How to remove the rear bumper
- open the trunk lid.
- in the trunk opening, we remove two thrust elements (you need to turn them counterclockwise by 90 degrees and remove them on yourself).
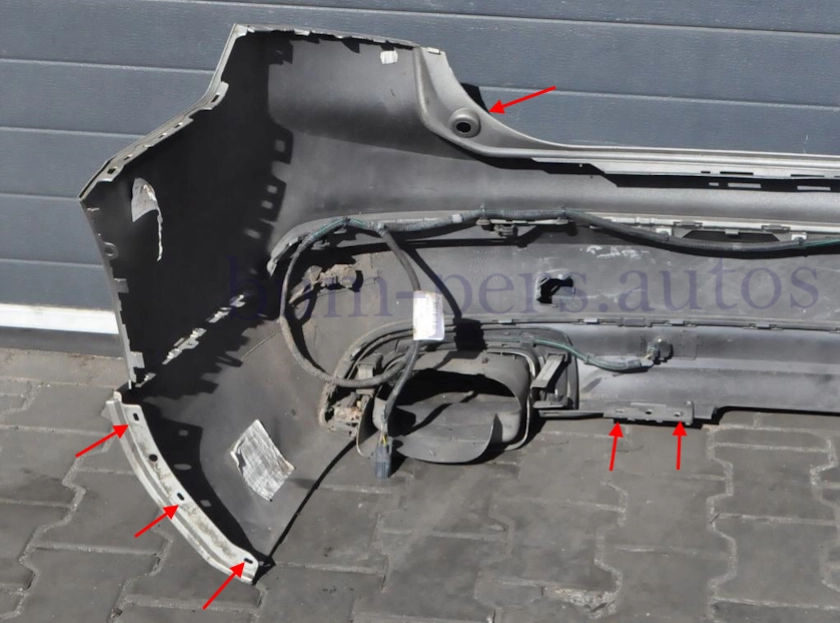
- on the bottom side, unscrew the four screws (twisted from the bottom up).
- in the wheel arches, we unscrew five screws on each side, which fasten the fenders (rear half).
- we release the rear part of the wheel arch extensions from the latches (put your hand behind the fender, squeeze the latches with your fingers and pull the expander towards you at the same time).
- release the sides from the latches in the brackets and (you need to pry with a flat screwdriver, be careful not to scratch the paint).
- release the latches under the taillights.
- with the assistant, we remove the bumper back (we look so as not to break the wires).
- disconnect the connectors of electronic components.


Volvo XC90 MK2, production: 2015-present, restyling 2024+.
Body Type: 5-door SUV
Assembling:
Sweden: Torslanda (Torslandaverken)
Malaysia: Shah Alam (VCMM)
India: Bengaluru (Volvo Trucks)
Plastic bumpers (may differ):
Polypropylene plus triple copolymer of ethylene, propylene and diene, 20% mineral filler. Marking >PP+EPDM-TD20<
