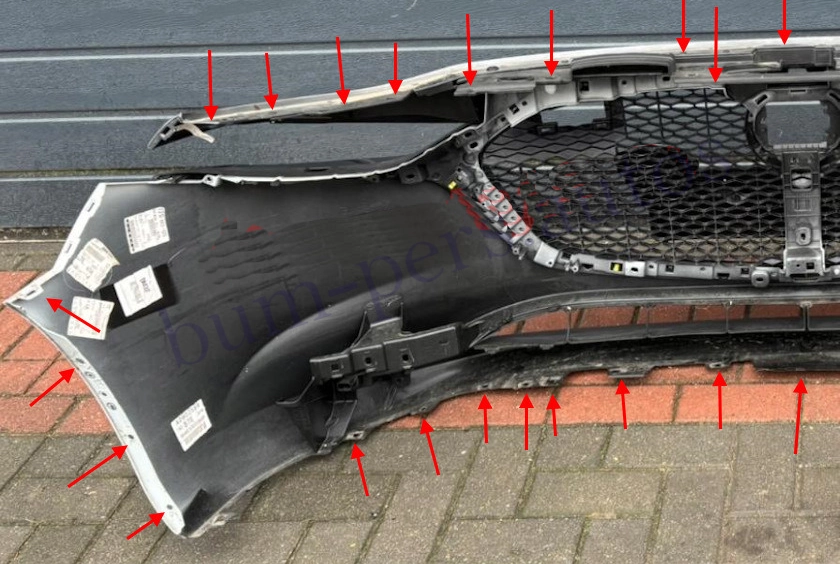
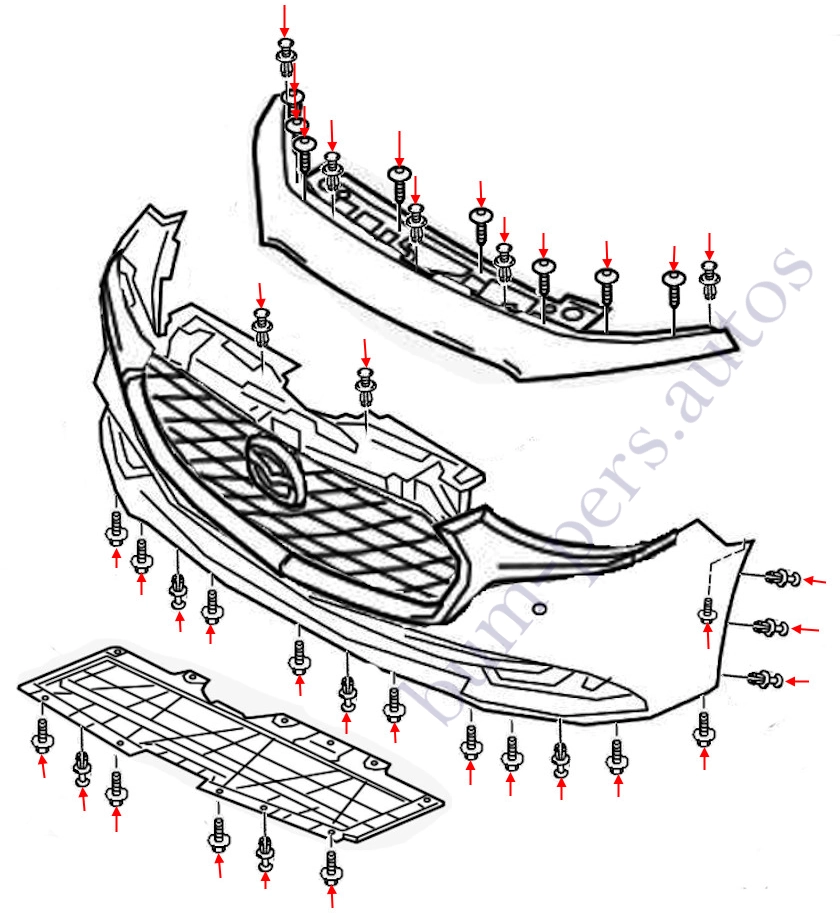
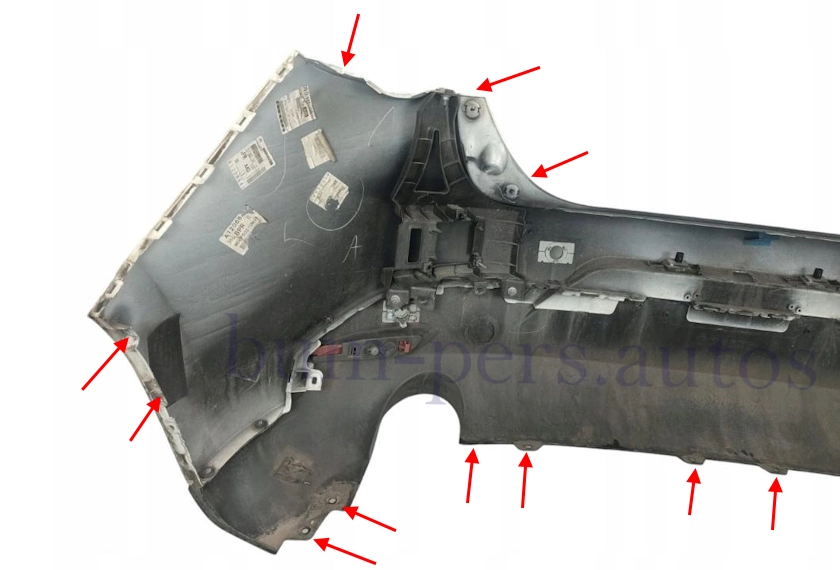
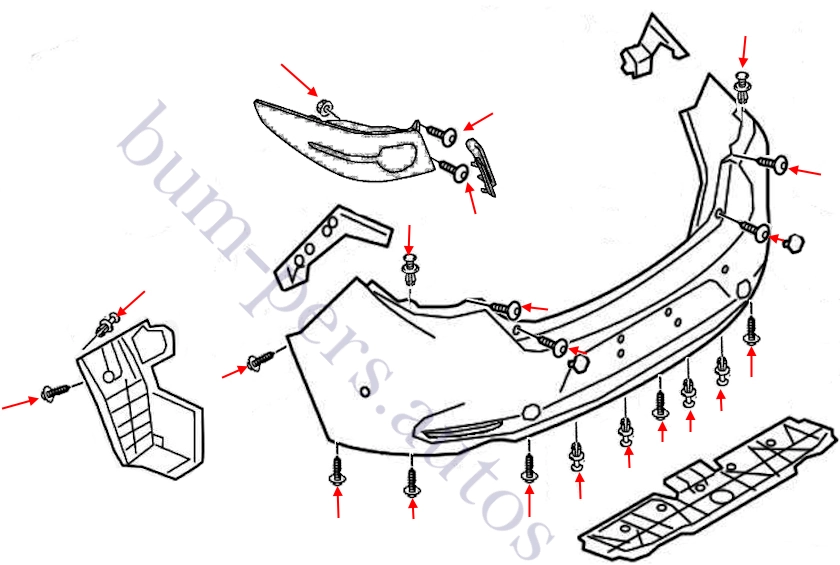
Depending on the year of manufacture and body type, the mounting points may vary slightly.
How to remove the front bumper
- open and fix the hood.
- unscrew the two screws that secure the air intake (remove the air intake is unnecessary, you can just lift it up).
- we unscrew the screws and pull out the pistons, release them from the latches and remove the cover plate over the radiator grille and headlights.
- under the cover plate, unscrew the two screws and pull out the clips into which they are screwed.
- from the bottom side, unscrew the screws and pull out the pistons that attach the fenders and plastic lining to the bottom of the bumper (you can not completely remove the lining).
- bend the lining down and unscrew four more screws under it and pull out two clips.
- in order not to remove the wheels, turn their front part inside the arch.
- in the wheel arches, we pull out three clips on each side, which fasten the fenders (front part).
- we move the fenders to the side and unscrew one bolt on each side (twisted from bottom to top), which fix the corners of the bumper to the wings.
- we release the latches in the wings (we take the corner and pull it towards us).
- with an assistant, we remove the front bumper forward (we look so as not to break the wires).
- we release the connectors of electronic components.


How to remove the rear bumper
In the hatchback and sedan bodies, the mounting points differ slightly.
- open the trunk lid.
- in the trunk opening, we take out two plugs and unscrew two screws under them.
- we remove the pads near the rear lights (they are held on latches) and unscrew two screws on each side under them.
- we pull out two clips, release them from the latches and remove the rear trunk panel lining.
- we release the edges of the side linings of the trunk (you need to get access to the rear of the taillights).
- behind the side linings, we unscrew one nut on each side, release the electrical connectors and remove the taillights.
- under the taillights, we unscrew one screw on each side and pull out one clip that attaches the upper part of the rear bumper.
- on the bottom side, we unscrew seven screws and pull out four clips (twisted and inserted from the bottom up), which fasten the lower part.
- in the wheel arches, we unscrew one screw and pull out one clip on each side, which fasten the fenders.
- we take the fenders to the side and unscrew one screw on each side, which fasten the sides of the bumper to the brackets.
- release the sides from the latches in the brackets (pull the corners towards you).
- with the assistant, we remove the bumper back (we look behind the wires).
- on the right side, disconnect the common connector of electrical equipment.


Mazda 3 MK4. Code of the BP model. Production: (2019-present)
Body Type: Hatchback / Sedan
Assembling:
Japan: Hōfu, Yamaguchi (Hōfu Plant)
Mexico: Salamanca (MMVO)
Thailand: Rayong (AAT)
China: Nanjing (Changan Mazda)
Vietnam: Chu Lai, Quảng Nam (THACO Auto)
Plastic bumpers:
Polypropylene plus filler. Marking >PP-(T21+S24)<
