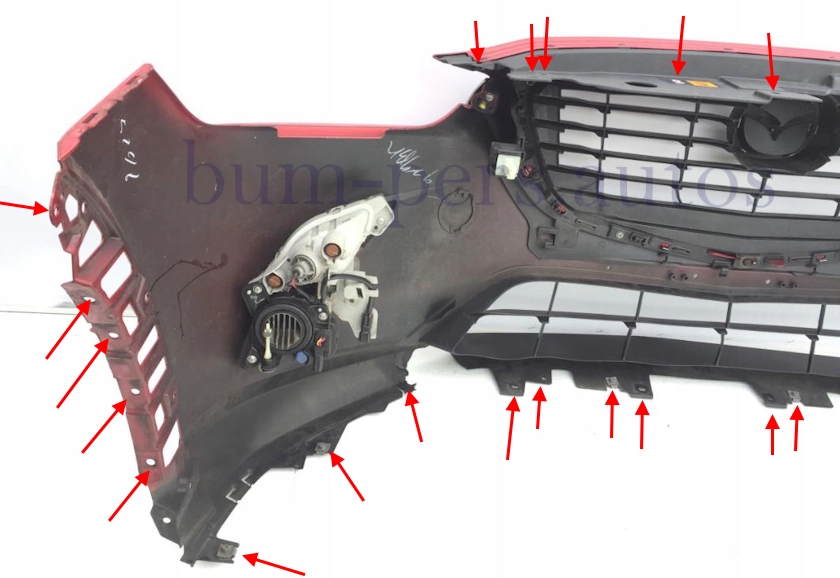
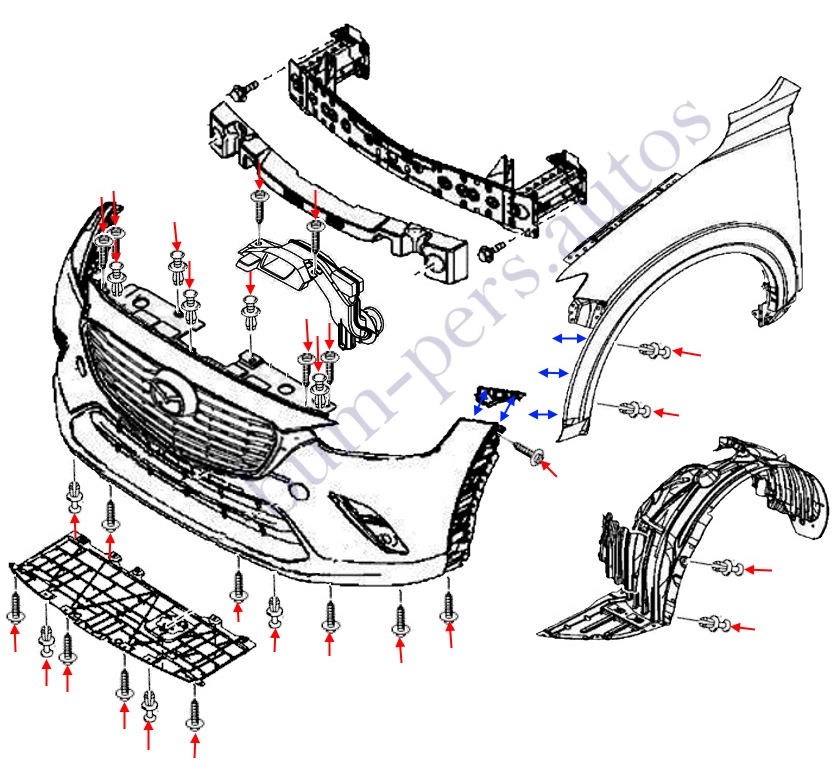
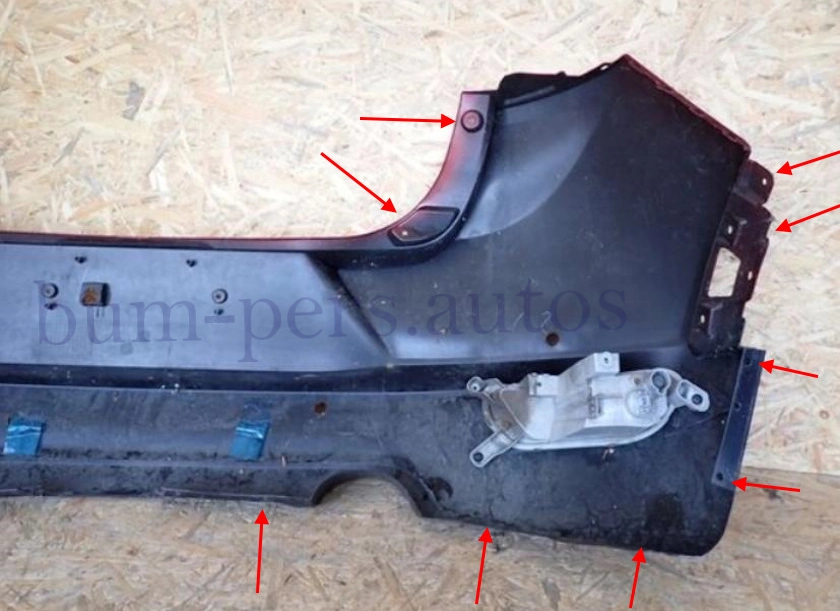
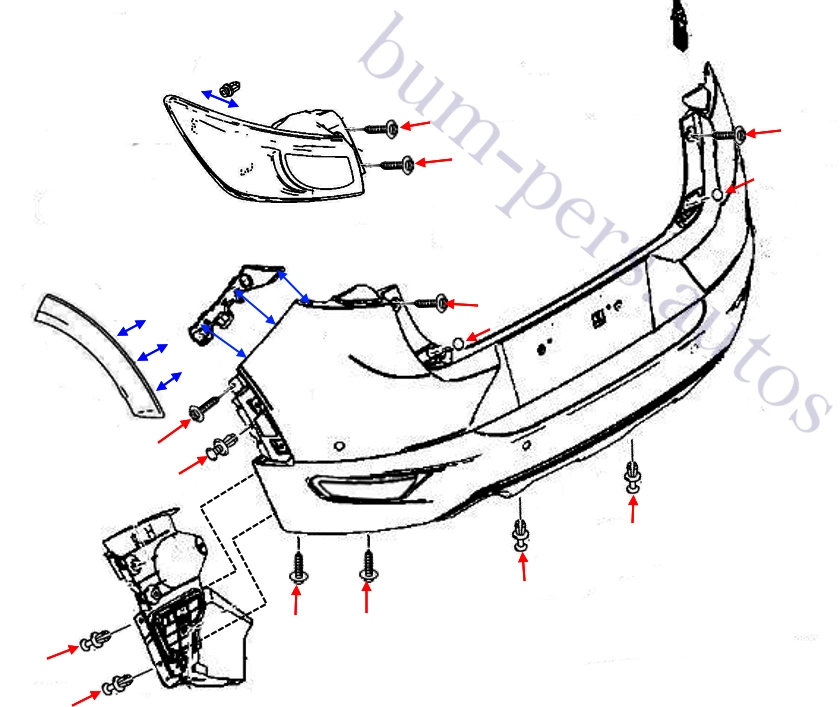
Depending on the year of manufacture, the mounting points may vary slightly.
How to remove the front bumper
- open the hood.
- unscrew the two screws that secure the air duct (completely remove unnecessary, hidden under the duct clip).
- unscrew the four screws and pull out the six clips that secure the upper part of the front bumper.
- on the bottom side, we unscrew the six screws that secure the fenders, unscrew the four screws and pull out the two clips that secure the front underbody panel (you don't need to remove the panel completely).
- we bend the panel down, unscrew the four screws under it and pull out two clips.
- turn the steering wheel to the side.
- in the wheel arches, we pull out two clips on each side, which attach the front part of the wheel arch extensions.
- we release the wheel arch extensions from the bumper (they are held on internal clips, you need to pull on yourself).
- under the wheel arch extensions, we unscrew one screw on each side that attaches the corners to the fenders and pull out two clips that attach the front part of the fenders.
- we release the latches in the fenders (you need to pull the corners of the bumper towards you).
- remove the bumper forward (make sure that the wires and hoses don't break).
- we release the connectors of electrical components.
- disconnect the common headlight washer hose from the pump.


How to remove the rear bumper
- lift up the trunk lid.
- in the trunk opening, unscrew two screws and pull out two plugs.
- we unscrew two screws on each side, release them from the retainers in the wings (you need to pull them parallel to the wing) and remove the taillights.
- from the bottom side, unscrew the four screws and pull out two clips.
- in the wheel arches, we pull out the clips that attach the slats.
- we release the wheel arch extensions from the bumper (they are held on internal clips, we pull them towards us).
- under the wheel arch extensions, we unscrew one screw and pull out one clip on each side.
- release the latches in the wings (pull the corners towards you).
- release the latches under the taillights.
- carefully remove the bumper back (look behind the wires).
- disconnect the connectors of electrical components.


Mazda CX-3 MK1. Model code DK. Production: 2014–2022. Facelift 2018-2022.
Body type:
5-door SUV (Compact crossover SUV).
Assembling:
Japan: Hiroshima; Hōfu (2014–2022)
Thailand: Rayong (AAT) (2015-present)
Mexico: Salamanca, Guanajuato (2022-present)
Plastic bumpers:
Polypropylene with the addition of filler. Marking >PP-(T25+S20)<.
