Depending on the year of manufacture, the number of screws and clips varies.
How to remove the front bumper
- open the hood.
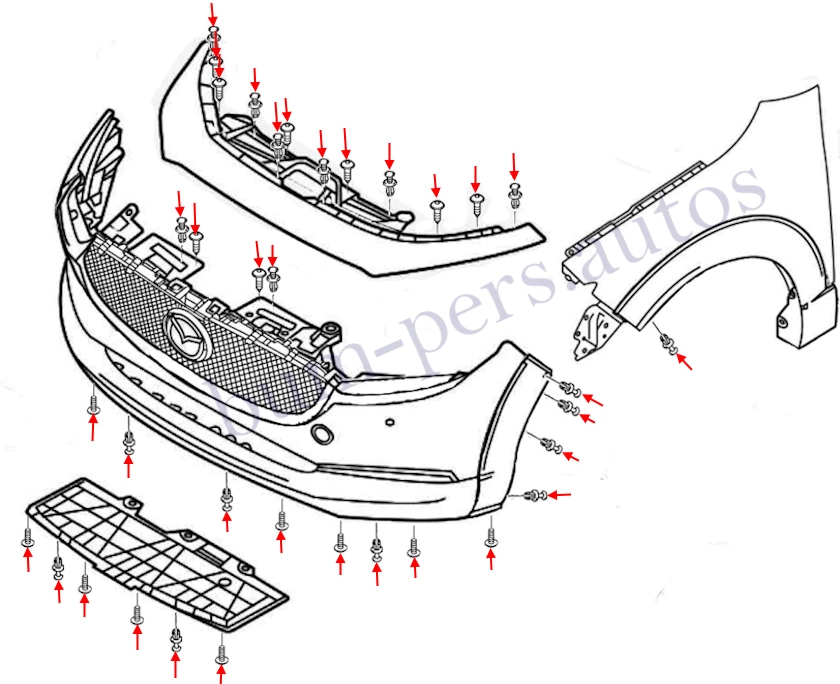
- under the hood, unscrew the two screws that secure the duct element.
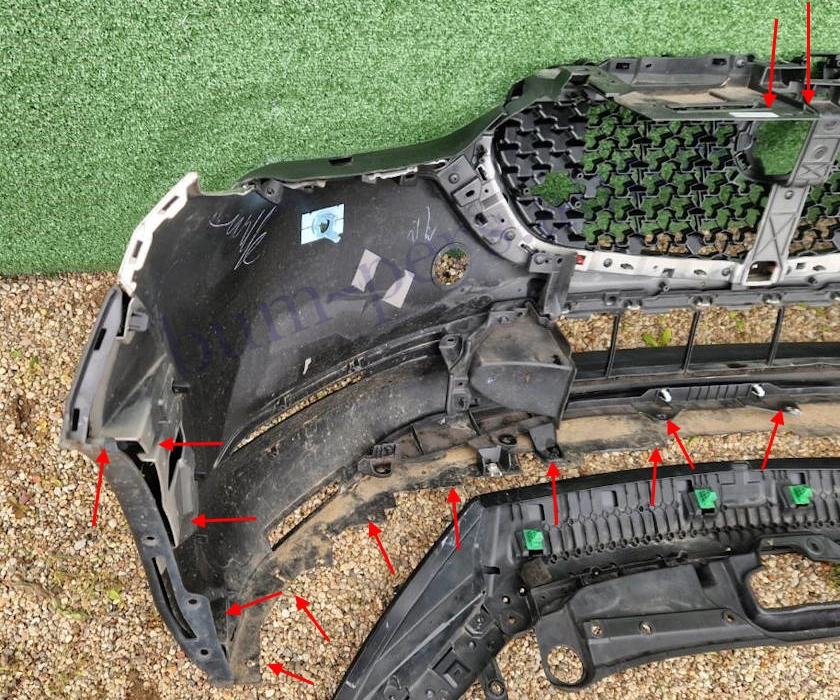
- unscrew the six screws and pull out the six clips that secure the top panel of the front bumper.
- release from the latches (pull up) and remove the panel.
- under the panel, unscrew the two screws and pull out the two clips that secure the upper part of the front bumper.
- we lie down under the car, unscrew ten screws and pull out four clips that attach the lower part to the protective linings.
- bend the middle lining down, unscrew four more screws and pull out two clips.
- we turn out the front part of the wheels in turn to the inner side of the arch.
- in the wheel arches, we pull out two clips on each side that attach the wheel arch extensions and three clips on each side that attach the fenders.
- we release the latches in the wings (you need to pull the corners of the bumper towards you).
- remove the bumper forward (pay attention to the wires).
- we release the connectors of electrical components.


How to remove the rear bumper
- open the trunk lid.
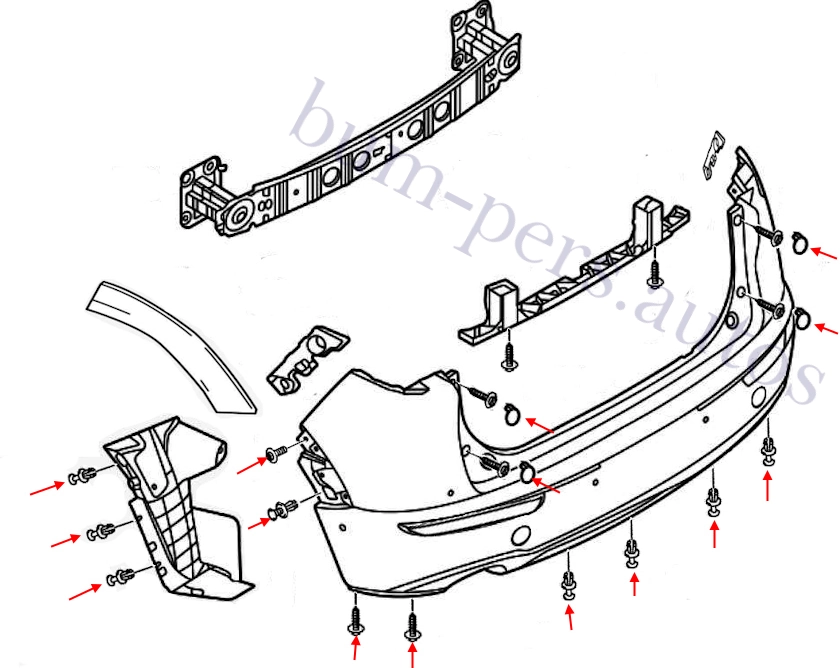
- in the trunk opening, we pull out the four plugs and unscrew the four screws under them.
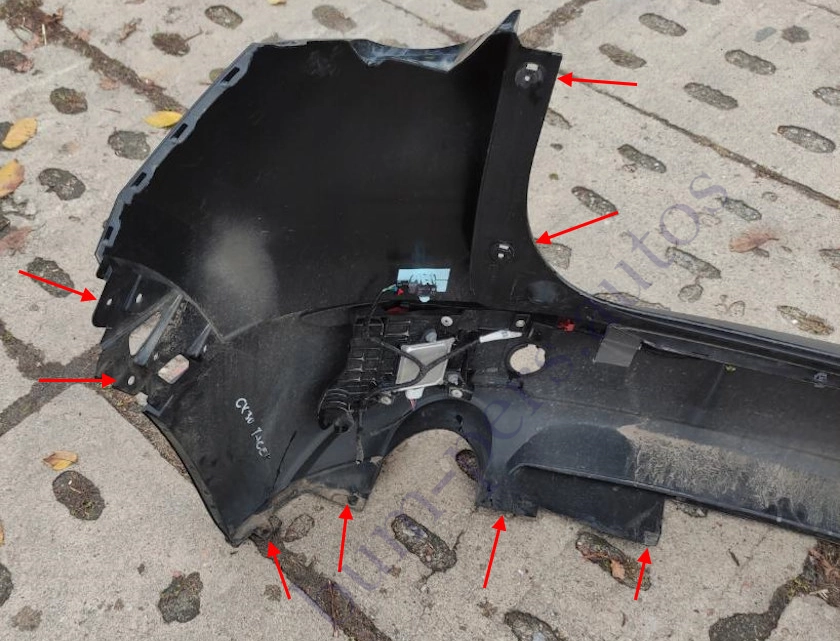
- from the bottom side, pull out four (two) clips that attach the lower part to the plastic rack, or unscrew two screws that attach the rack to the body.
- in the wheel arches, we pull out three clips on each side, which fasten the slats.
- we remove the wheel arch extensions (they are held on internal clips, you need to open the passenger rear door and pull the wheel arch expander towards you starting from the door opening).
- under the wheel arch extensions, we unscrew one screw and pull out one clip on each side.
- release the latches in the wings (pull the corners towards you).
- carefully remove the bumper back (pay attention to the reins).
- the electrical connectors are located behind the right side panel of the trunk. It is necessary to raise the trunk floor, remove the rear panel trim, release the edge of the right side trim and disconnect the electrical connectors behind it. Then, through the hole in the body, pull out the common wiring harness.


Mazda CX-30 MK1. DM model code. Production: 2019-present (2025).
Body type:
5-door SUV (Compact crossover SUV).
Assembling:
Japan: Hiroshima
China: Nanjing (Changan Mazda)
Mexico: Salamanca, Guanajuato (MMVO)
Thailand: Rayong (AAT)
Malaysia: Kulim, Kedah (Inokom)
Russia: Vladivostok (Mazda Sollers)
Plastic bumpers:
Polypropylene with the addition of filler. Marking >PP-(T21+S24)<.
