How to remove the front bumper
- lift up the hood.
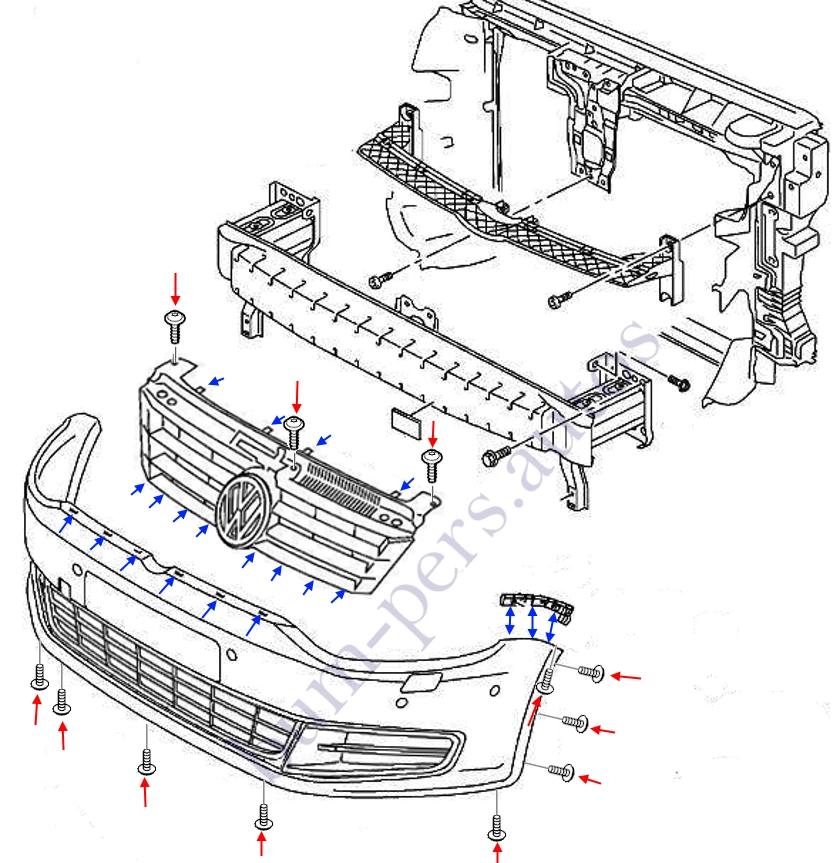
- unscrew the three screws (twisted from top to bottom) that secure the radiator grille.
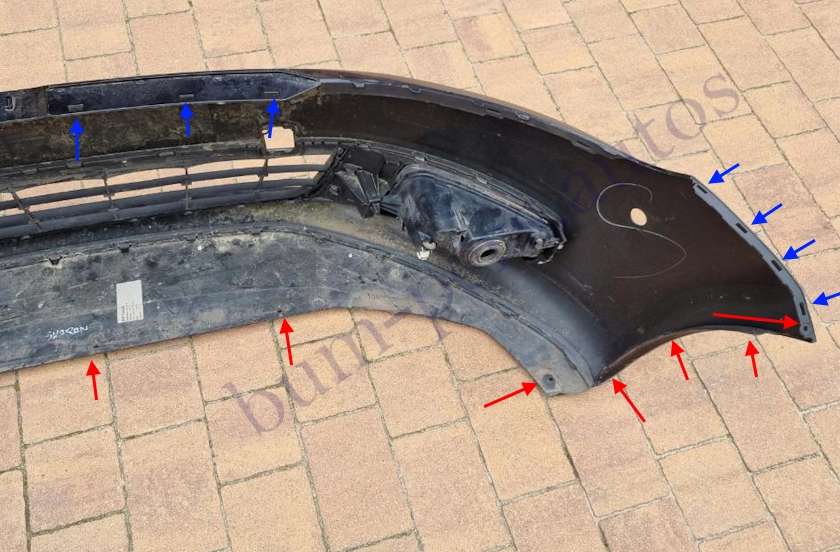
- we pull on ourselves and remove the radiator grille (it does not hold four latches from the top and eight from the bottom).
- from the bottom of the bumper, we unscrew five (maybe seven) screws (twisted from bottom to top).
- turn the wheels to the left or right.
- in the wheel arches, we unscrew the screws (three on the left and three on the right side) that secure the fenders.
- bend the slats to the side and unscrew the two screws (one screw on each side) that attach the corners to the guide profile in the wing.
- we release four latches on each side in the wings (we take the corner and jerk it towards ourselves.
- use a flat screwdriver to release the six latches behind the radiator grille.
- (need an assistant) remove the bumper forward (look for wires and hoses).
- (if available) disconnect the connectors from the temperature sensor, fog lights and parking assistant.
- if there are headlight washers, disconnect the hoses (please note that liquid will flow out).


How to remove the rear bumper
- lift up the trunk lid (rear door).
- in the side panels of the trunk, open the covers.
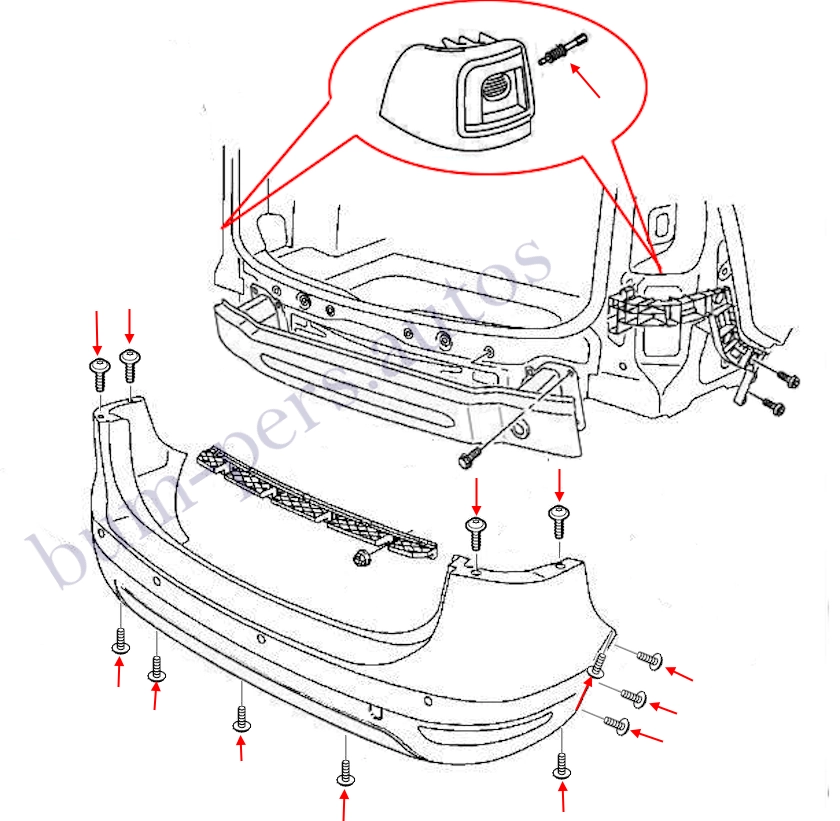
- under the covers, we unscrew the two plastic screws that secure the taillights with our hands.
- we release the electrical connectors (you need to pull out the red latch, then pull out the connector) and remove the rear lights.
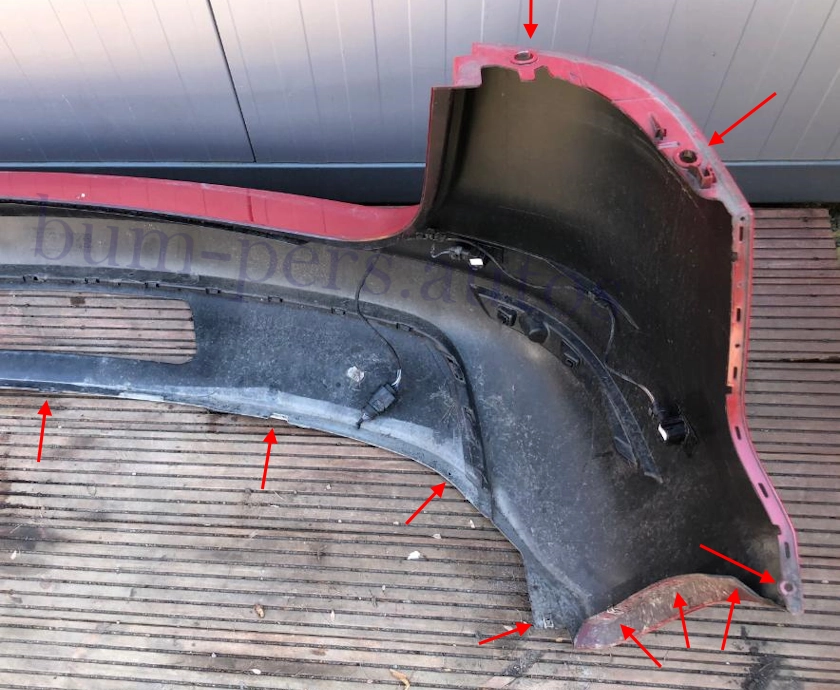
- under the taillights, unscrew the four screws (two on each side) that secure the top of the rear bumper.
- in the wheel arches, we unscrew three screws on each side (in order not to remove the wheels, take the Torx nozzle and ratchet), which attach the fenders (rear part).
- we move the fenders to the side and unscrew one screw on each side, which fix the corners to the guide profiles in the wings.
- unscrew the lower screws (depending on the year of manufacture and configuration, the number of screws may vary).
- we release the sides from the latches in the wings (pull the corners with a jerk towards ourselves).
- release the latches in the trunk opening (just pull on yourself).
- with the assistant, we remove the bumper back (we look so as not to break the wires).
- on the left side of the traffic hike, we release the common electrical connector.


Volkswagen Sharan second generation, Type 7N
Production: 2010-2022 (restyled 2015-2022)
Build: Portugal: Palmela (AutoEuropa)
Body type: 5-door minivan
Plastic bumpers (may differ):
Polypropylene plus triple copolymer of ethylene, propylene and diene, 10% mineral filler. Marking >PP+EPDM-T10<
